Yamato Resurrection Discography
4

Final Yamato‘s epilogue has an interesting history all its own. It was the last sequence of the production, cut together the night before the movie premiered in March, 1983. Thus, it was basically abandoned before it could be finished. When Nishizaki spot-checked it in theatres on opening day, he was so unhappy with it that he ordered it eliminated from all seven prints of the film showing in Tokyo. In other words, only viewers who caught the first screenings on day one got to see it.
The piece was reworked and lengthened over the summer into its finished form, which was attached to the 70mm re-release. In 1989, after wresting the Yamato catalogue from other video labels, Bandai rolled out its first laserdisc box set of all the movies, which included the first cut of the epilogue as a bonus feature. It has been included in all subsequent releases since then, and can also be found on the DVD from Voyager Entertainment.
Though their content was basically the same, here’s how the two versions differed…
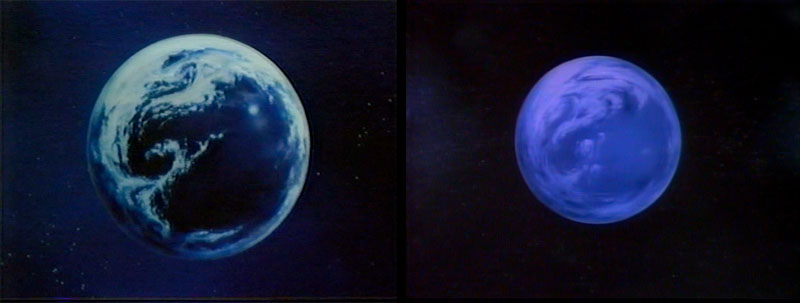
Fade up on two different paintings of Planet Earth.
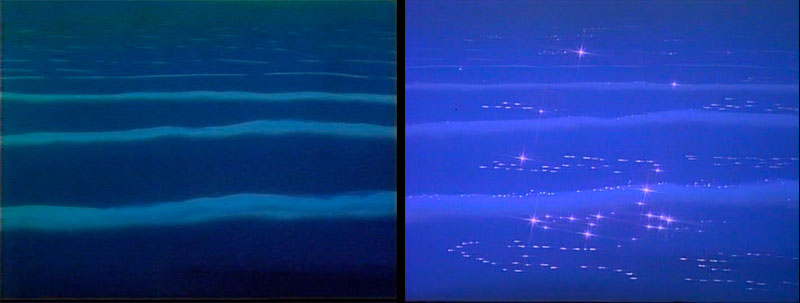
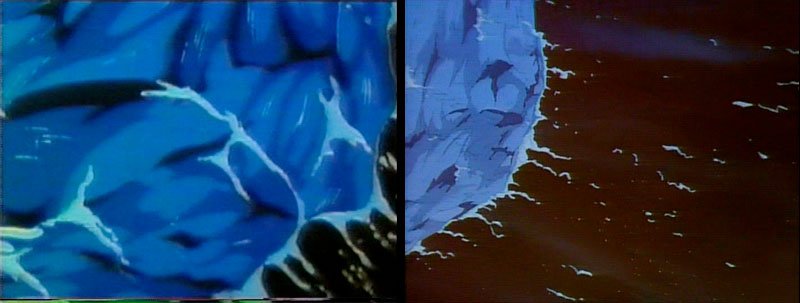
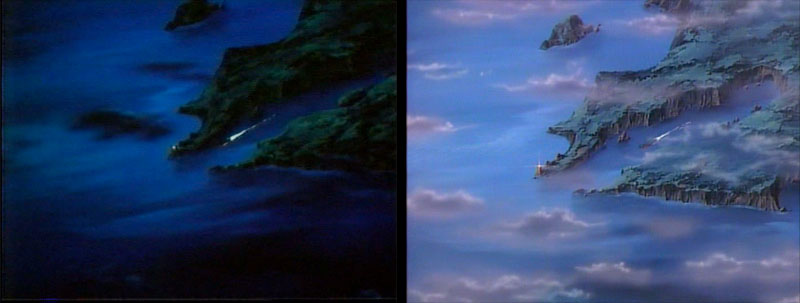
Dissolve to waves lapping against a shore. Version B added color enhancement and glitter.
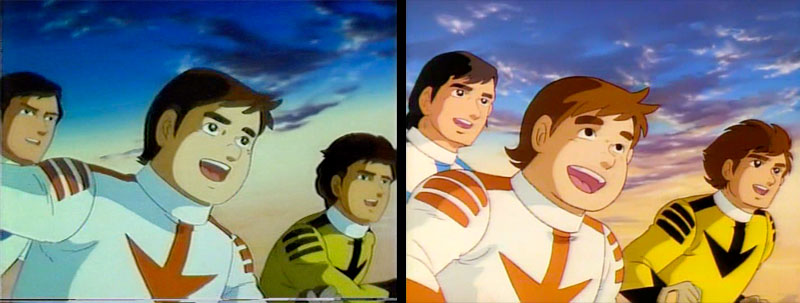
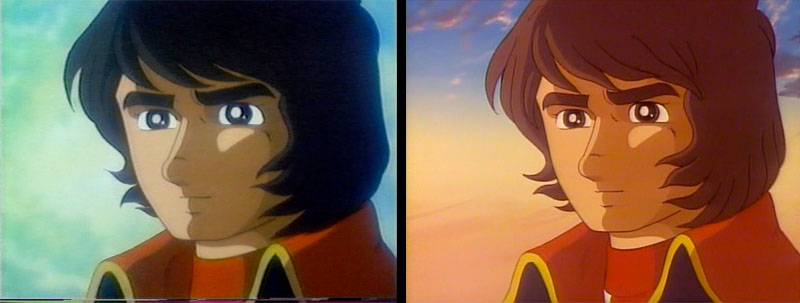
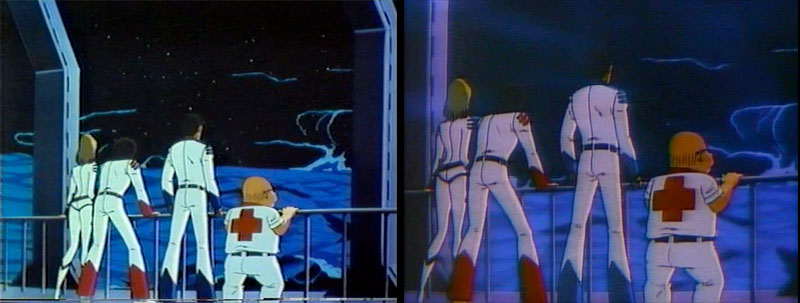
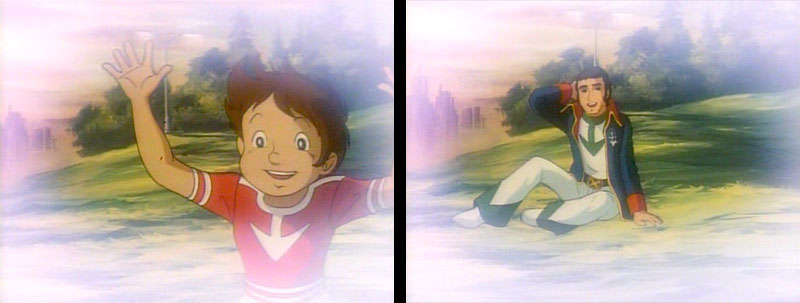
Yamato crewmembers run along a beach. All of these shots were redone for Version B to improve the likenesses and liven up their expressions.

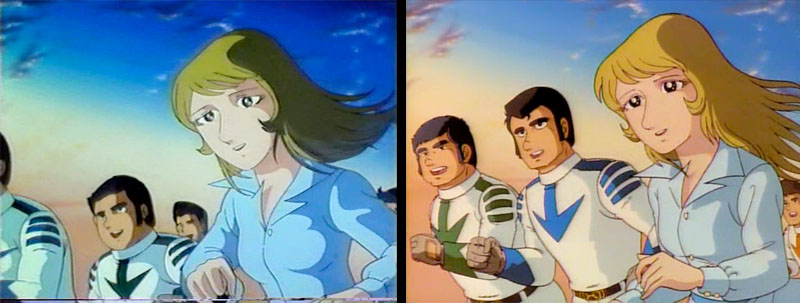
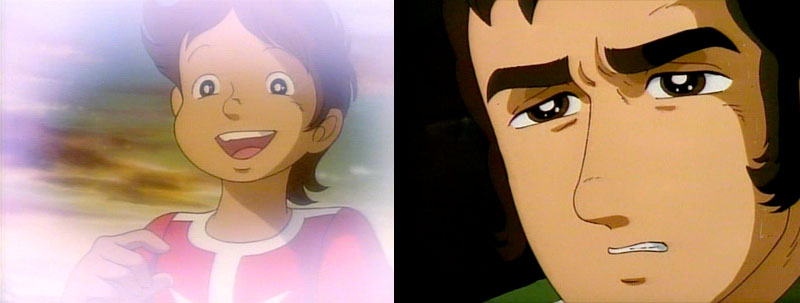
Yuki in particular benefited from this revision process, losing the directionless stare seen in Version A.

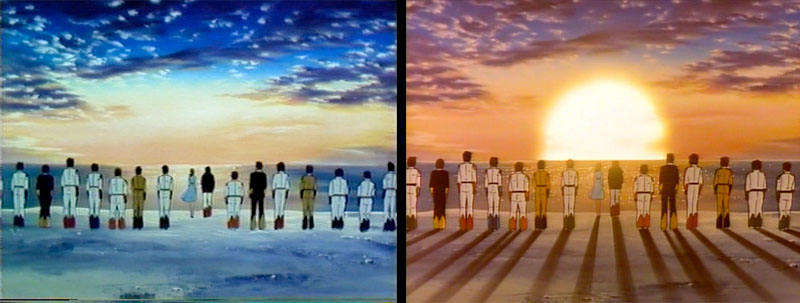
Everyone runs toward the sunset. In Version B the sun is still mostly above the horizon and glitters on the water.
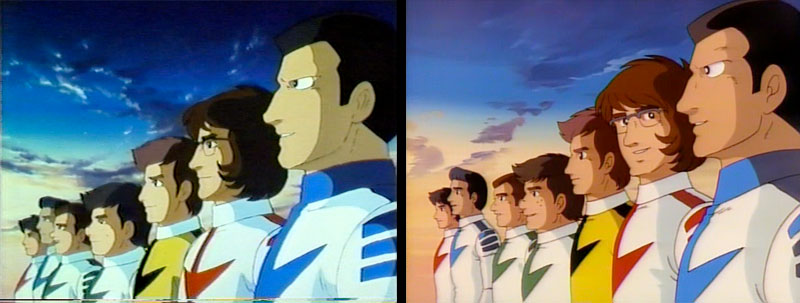
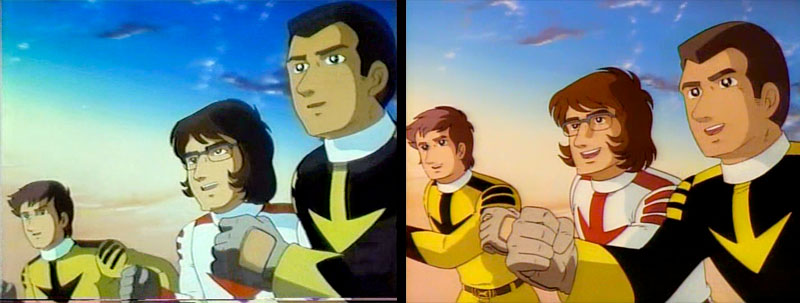
Everyone lines up at the shoreline. Version B gives them livelier expressions and more interaction.
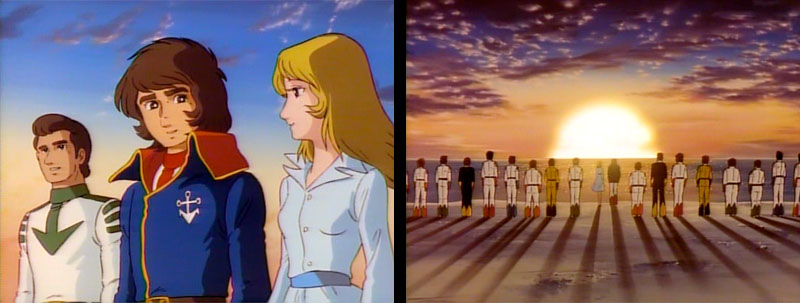
This shot of Kodai and Yuki was done for Version B, which then cuts wide to see everyone standing together.
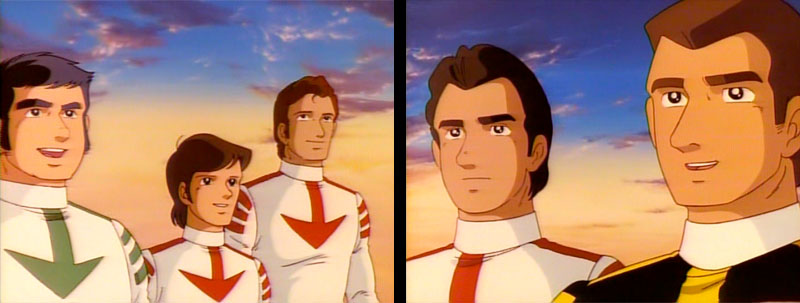
Version B also includes new shots of selected characters, mostly crewmembers who were cadets in Series III.
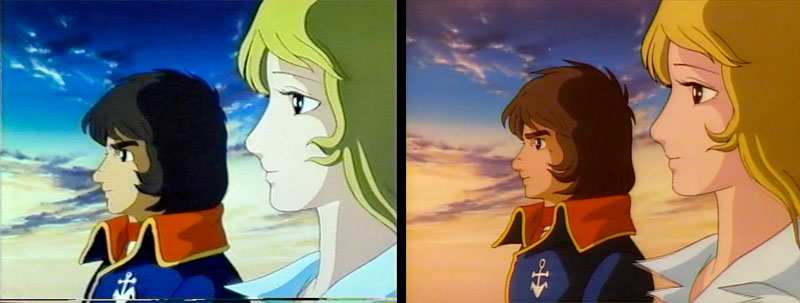
We go to a two-shot of Kodai and Yuki together. The color was warmed up for Version B.
Back to the group shot: Version B added a sun and animated Yuki’s dress blowing in the breeze. (It was unmoving in Version A.)
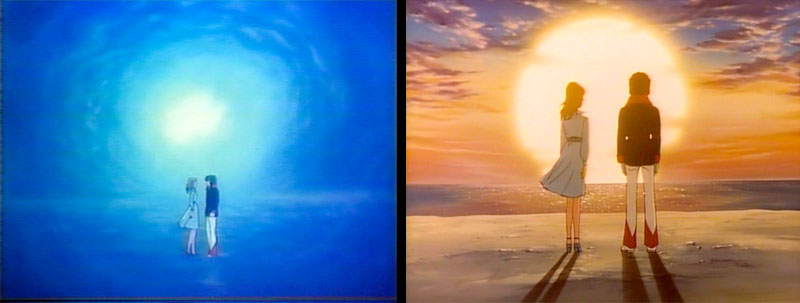
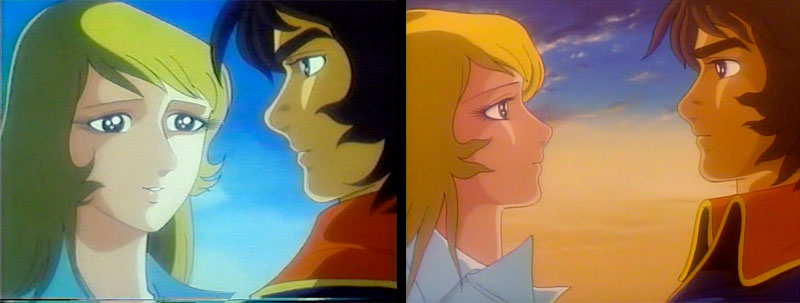
The other characters fade off, leaving our two lovebirds with eyes only for each other. These two shots were redone for Version B in the warmer color palette.
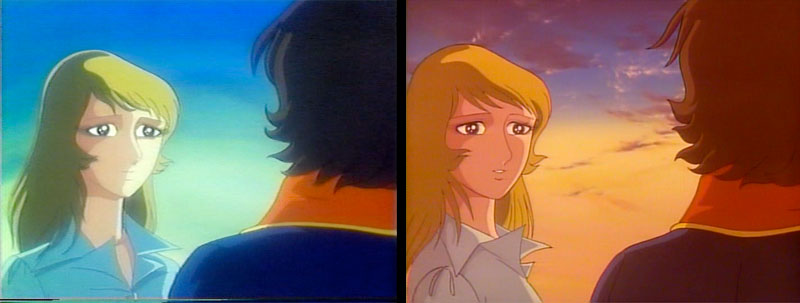
This animation of Kodai was good enough to keep, but the sky behind him was changed for Version B.
The next shot ended on slightly different angles from A to B.
Who hears wedding bells? The animation was the same in both versions, but the color tint was altered.


You may kiss the bride. Version B goes to a different background here, and the most notorious divergence of the entire film begins.
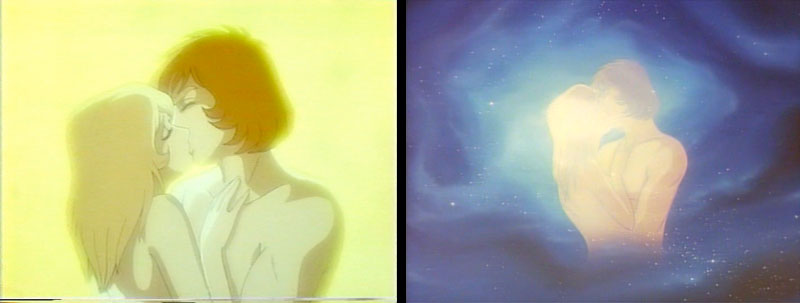
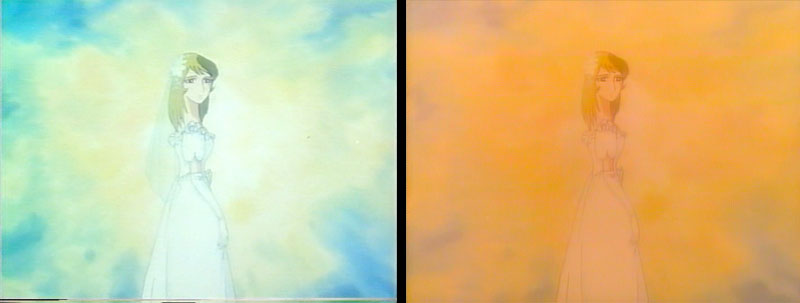
All Earthly cares dissolve away along with all Earthly clothes. In Version A, we stay with the lovers for a while they consummate their marriage on camera. In Version B they drift off into outer space where we cannot follow to intrude on their most private and tender moment.

Version B then takes an entirely different turn, reuniting us with the Queen of Aqarius.

She delivers a short lecture on the grand cycle of life in the cosmos, and the film’s narrator returns to say his eternal goodbye to Yamato. Version B then fades to black.

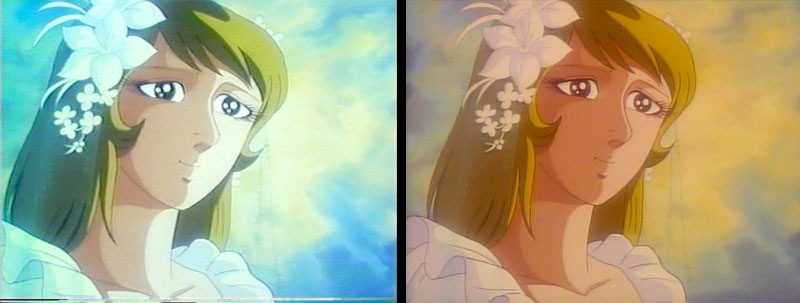
Version A concludes with a thoroughly satisfied Yuki and then goes to end credits. Whereas Version B’s credits roll over a quiet ocean background, A gives us a welcome montage of past moments and one more round of the classic Yamato theme song.
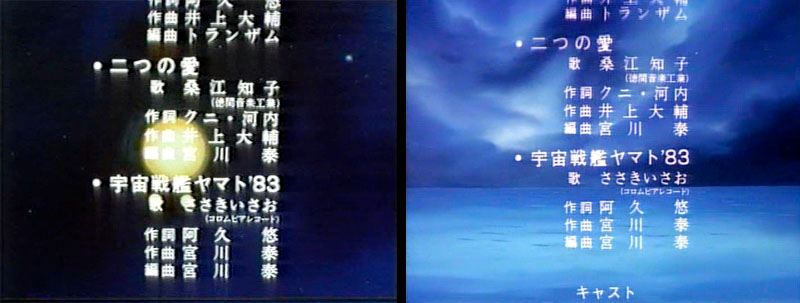
This particular rendition of the theme was called Space Battleship Yamato ’83 and was newly recorded for the film. Oddly, it was left out of Version B entirely, even though it remained listed in the credits. Just for the sake of complete internal accuracy, it was restored to the Voyager Entertainment DVD release.

Both versions of the film end with one more divergence. Version B simply says, “End.”
Watch the Version A epilogue on YouTube here
Continue to 1983 magazine coverage
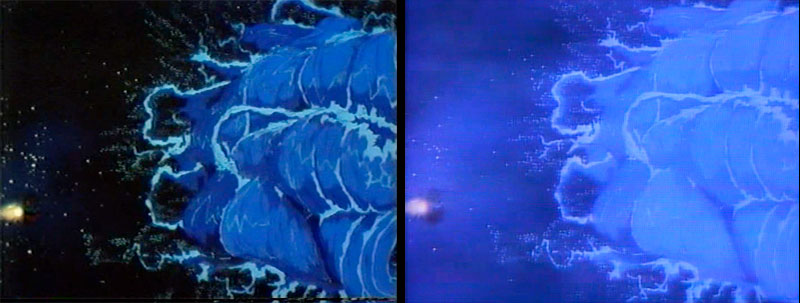
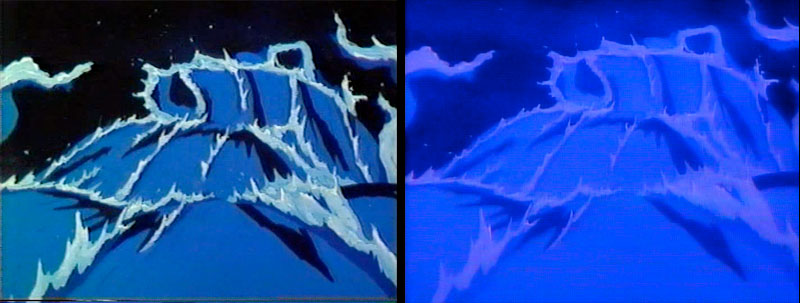
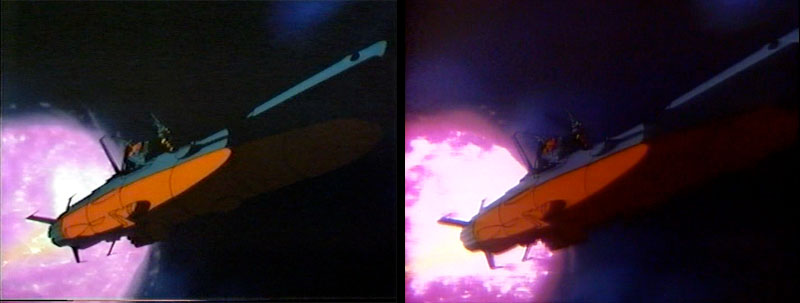
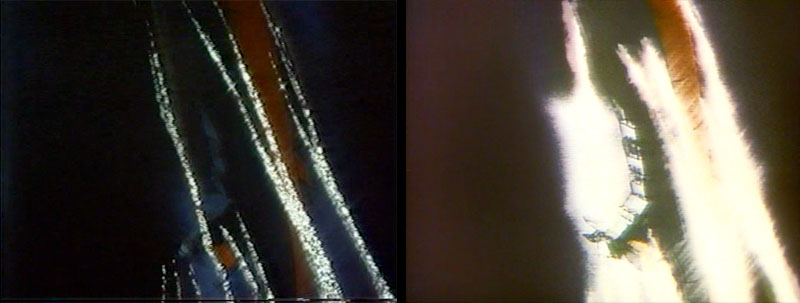
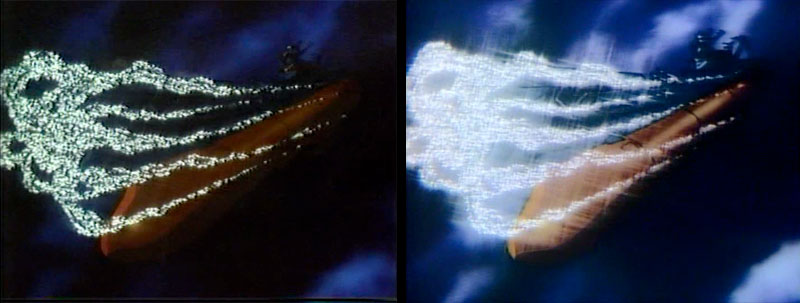
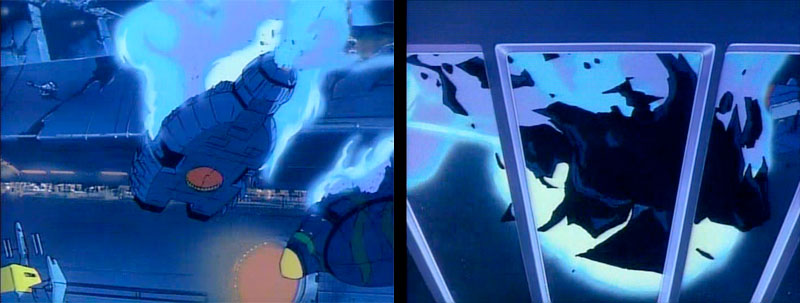
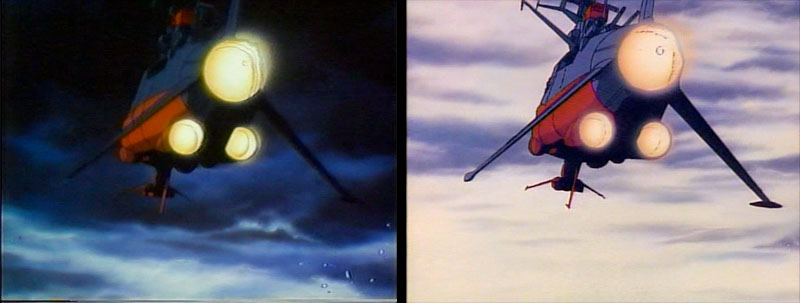
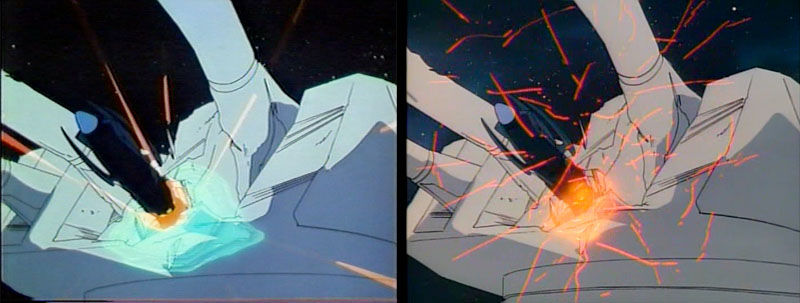
The enhancement in Version B continues as Yamato lines herself up in the path of the roiling space flood.
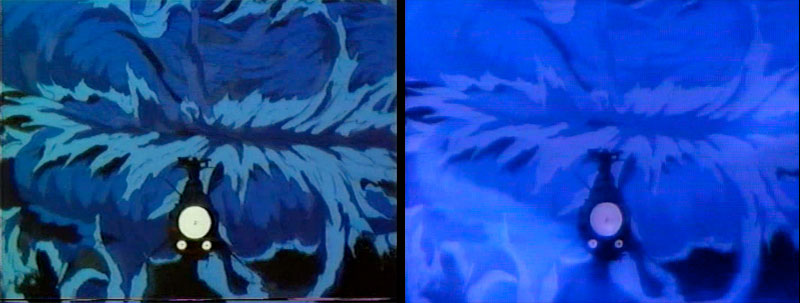
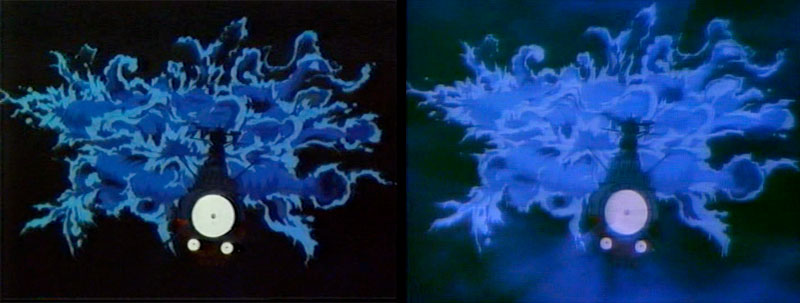
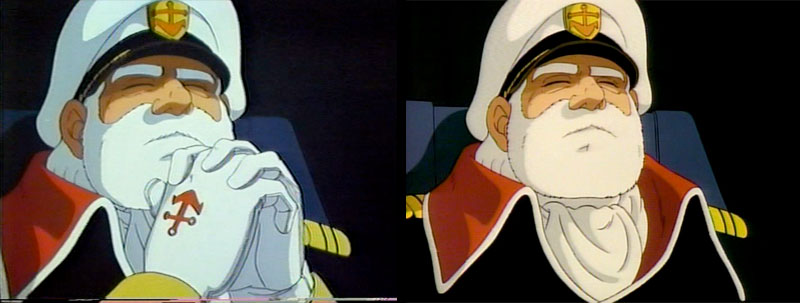
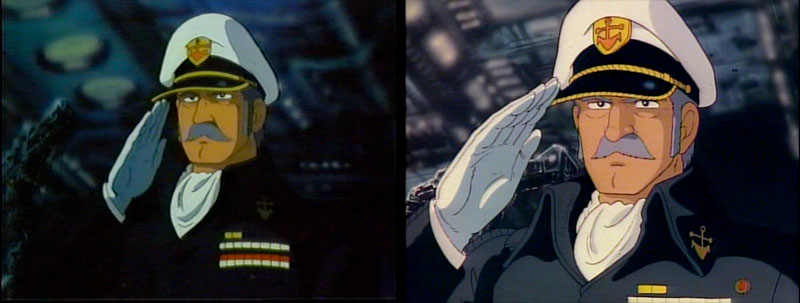
Though similar in composition, these two shots bracketed scenes of Captain Okita preparing to fire the Wave-Motion Gun.
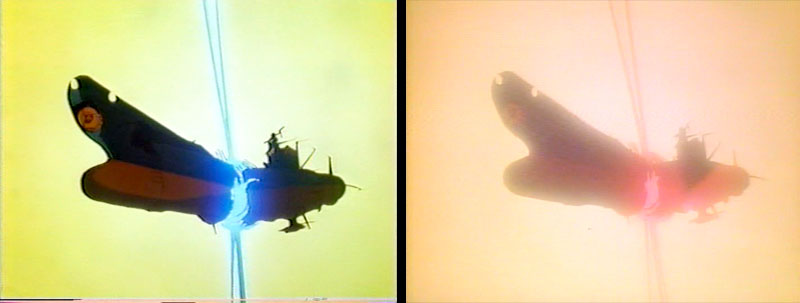
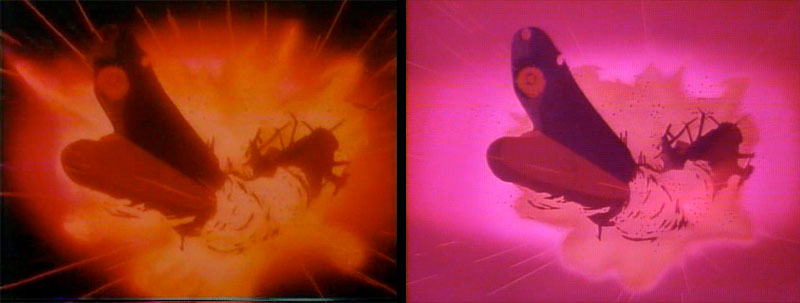
The fatal burst tears Yamato in half, just like its World War II predecessor. This, of course, was another chance to apply color enhancement in Version B.

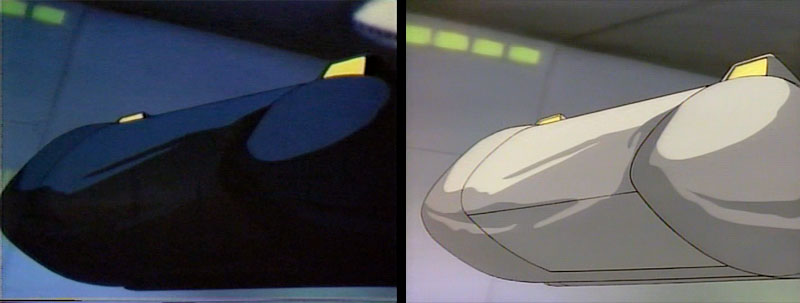
Another rare case of a revised scene that wasn’t an improvement: the crew watches the vast, flood-stopping explosion from the safety of the Fuyuzuke. Version A showed this clearly. Version B enhanced the scene to the point of blurring the ship out of view and then zoomed in to eliminate it entirely.
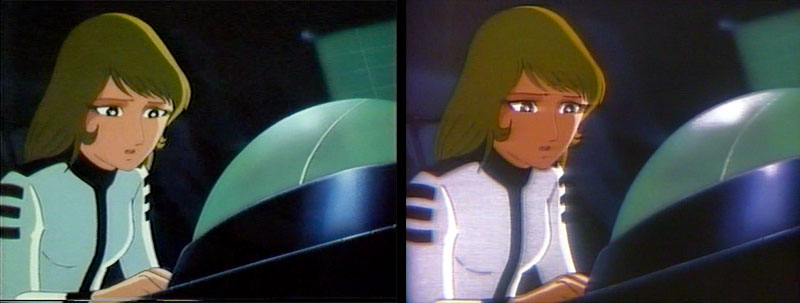
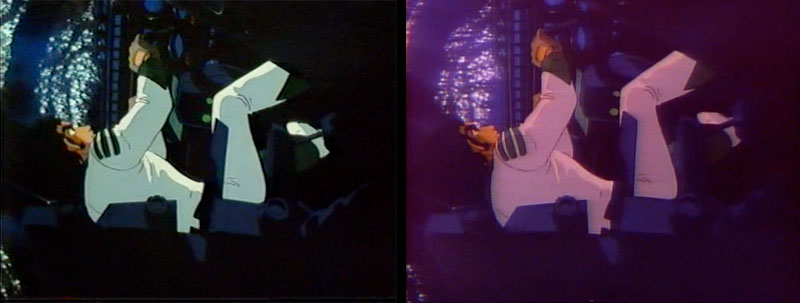
Next we cut inside for reactions from Kodai and Yuki. Here’s another scene that was completely redrawn for Version B.

Version A then cut in for close-ups of them both…
…while Version B stayed on the first shot and had Yuki move to Kodai and look away.
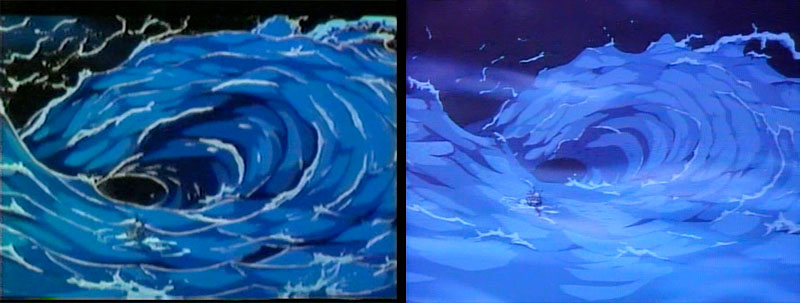
We then go back outside to see the waters of Aquarius reform into a self-contained mass. Enhancement effects were applied to Version B.
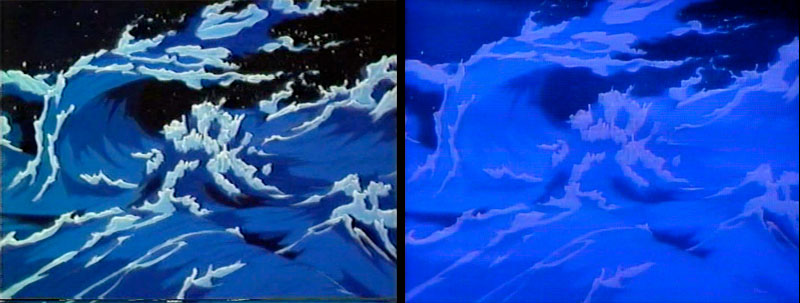
The waters coalesce in a long panning shot that goes to open space in Version A but includes a receding Aquarius in Version B.
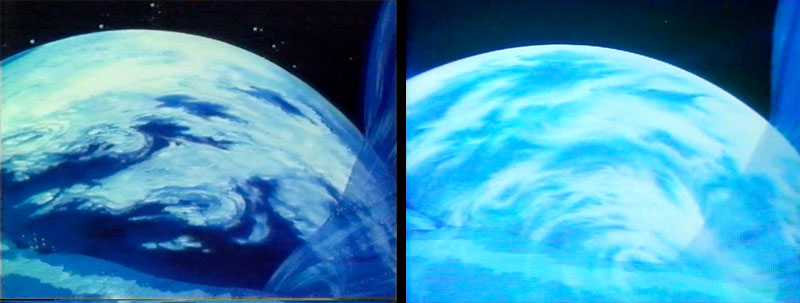
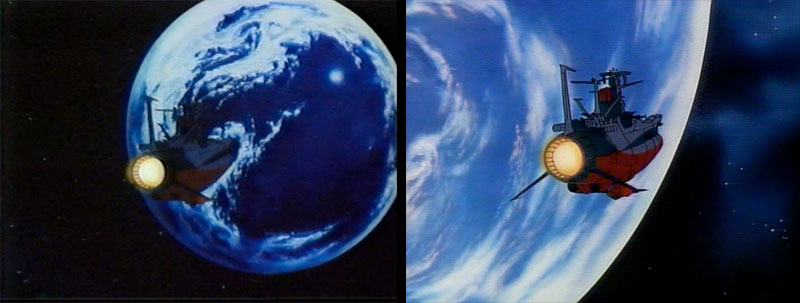
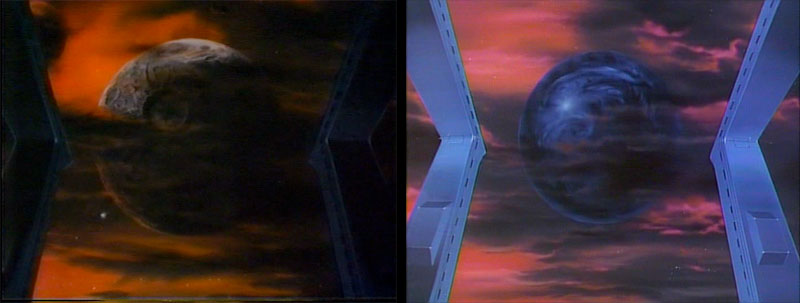
Though taking on a substantial amount of water, Earth has escaped disaster. As with some earlier scenes, the planet was repainted for Version B.
Our last shot of the crew watching from Fuyuzuke. Version B zoomed in tighter on this shot and lost some picture resolution as a result.
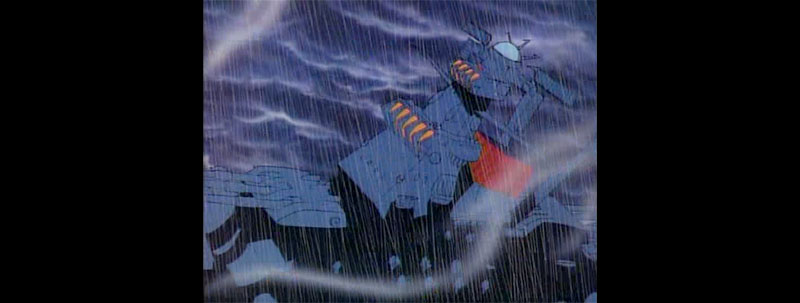
The flood begins to calm and we see the top of Yamato‘s superstructure peeking out from the waves.
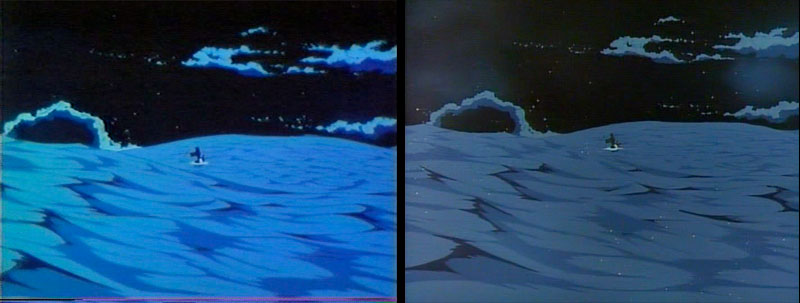
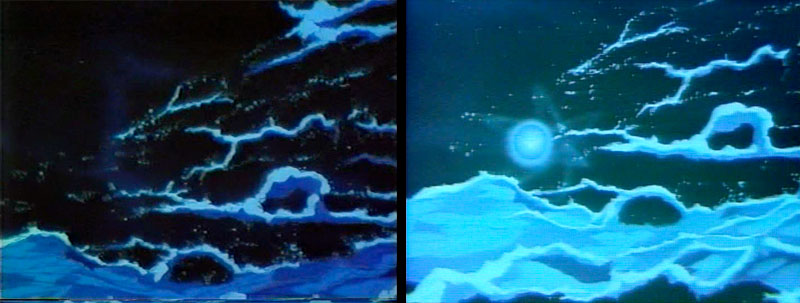
The storm abates and the picture widens. In Version B, the water was slightly transparent, letting some starlight through. This is also where the color enhancements ended.
Cutting out even wider, we see a different background and more water in Version B.
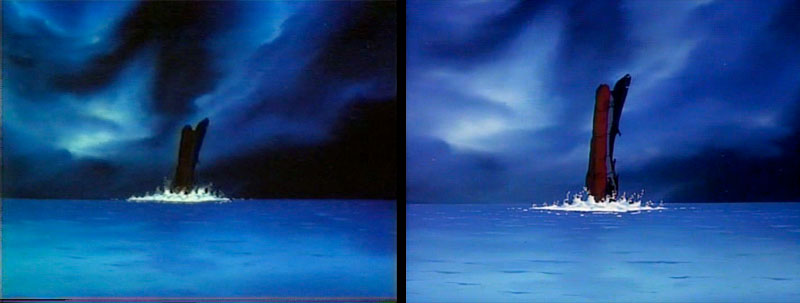
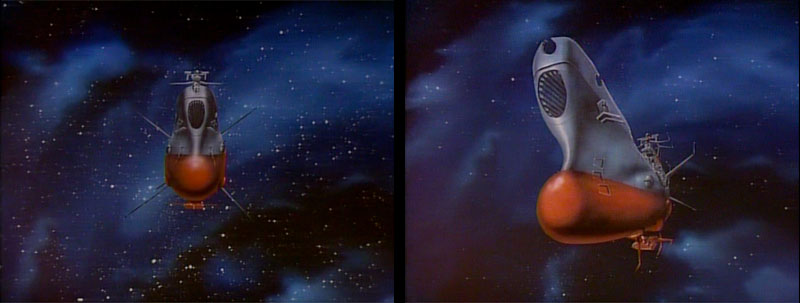
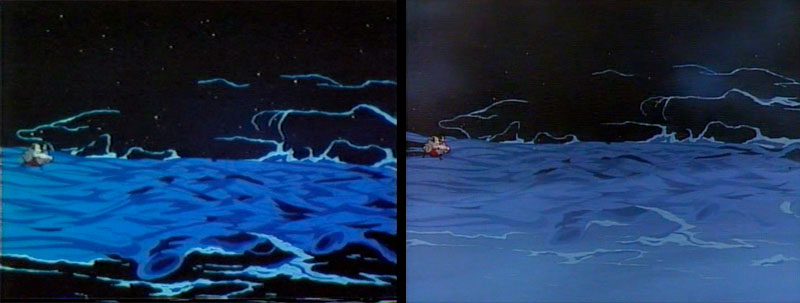
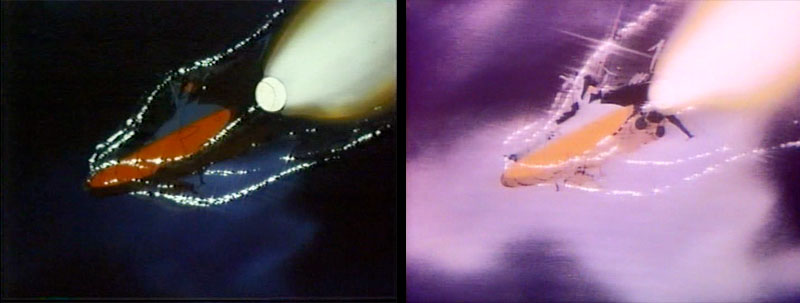
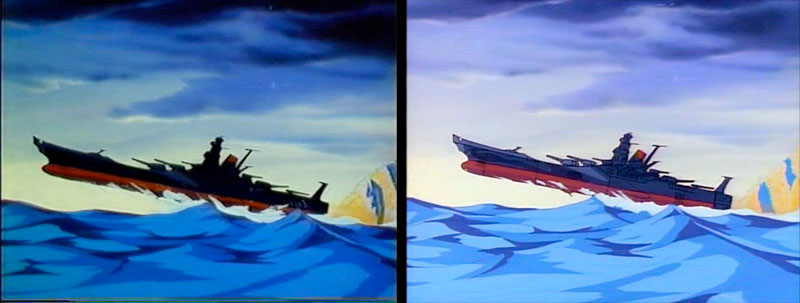
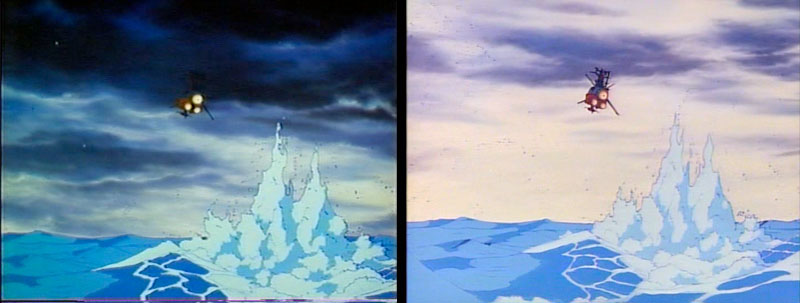
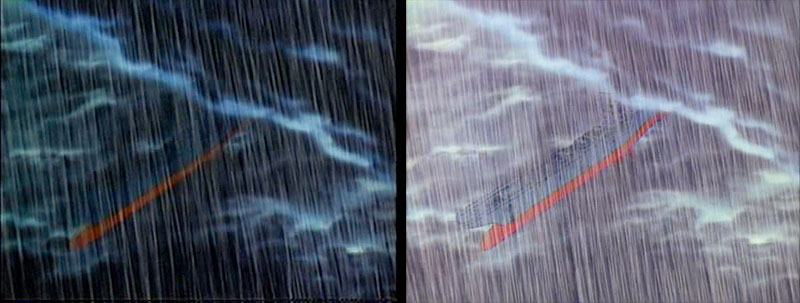
Mysteriously, a mostly-intact Yamato bursts out of the waves, trumpets its death knell, and slowly drops back down. This shot was retimed and reshot in Version B for a much longer descent into the watery grave.
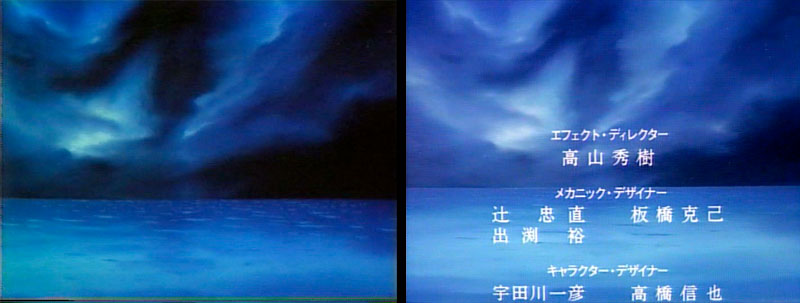
The waves quietly lap for about a minute, and the two versions diverge for the last time. Version A goes to the epilogue and then the credit roll. B begins with the credit roll and then goes to the epilogue. In either case, the epilogue contains significant differences as we’re about to see.

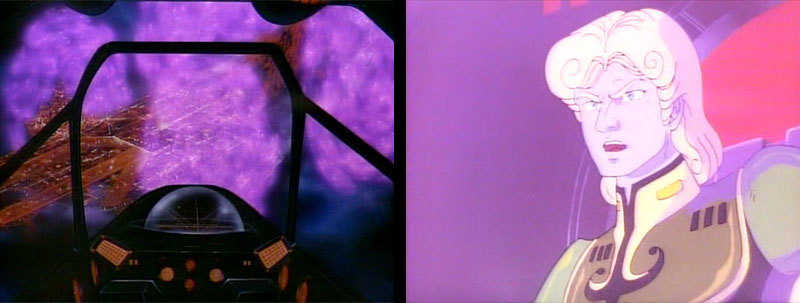
Aquarius is now headed for Earth and Captain Okita explains his final plan of attack to the crew. The background and framing of this scene changed noticably from Version A to Version B.

Emperor Lugal’s remaining fleet is hot on Yamato‘s heels, and they’re much easier to see in Version B.
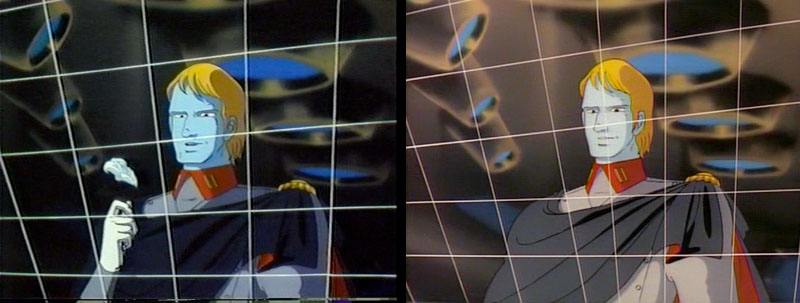
Dessler shows up just when he’s needed most. His first on-screen appearance differs slightly from A to B. In A he starts with a raised flower (recovered from Yamato‘s earlier funeral offering at his ruined planet) whereas in B he starts with the flower below camera range. Also, the grid on Yamato‘s viewscreen was redrawn for Version B.
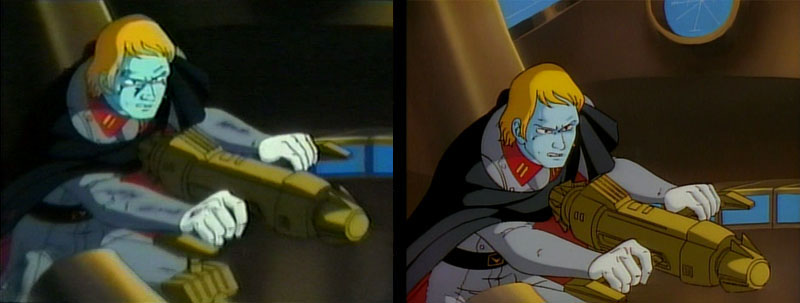
A few seconds later, Dessler takes aim at Lugal’s ship with the Dessler cannon. In Version A, he’s been roughed up a bit; scenes were planned that would show him getting tossed around, but they didn’t make it into the film for whatever reason. (For that matter, Dessler and Lugal were originally supposed to kill each other in this battle, but that didn’t happen either.) Since the unproduced scenes were never restored, Dessler simply got cleaned up for Version B and they were never missed.

Yamato escapes while Desslok deals the final smackdown to Lugal. This shot of the bridge was widened for Version B, but the background painting was rather clumsily expanded. Side note: in the movie script, Dessler was to die in his battle with Lugal. Apparently he was pardoned by the governor at the last moment.

Yamato moves to rendezvous with EDF battleship Fuyuzuke. This shot was new in Version B.
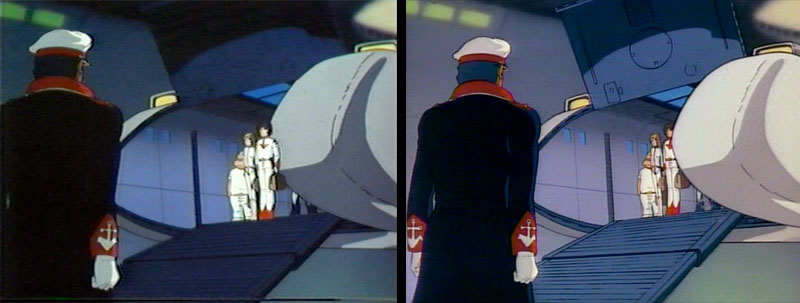
After an emotional farewell with Captain Okita, the crew transfers to Fuyuzuke, and we see another good reason to remake a film: Version B corrected a problem with the cel layers.
Something else you can do in a remake: repaint a cel that was originally the wrong color.

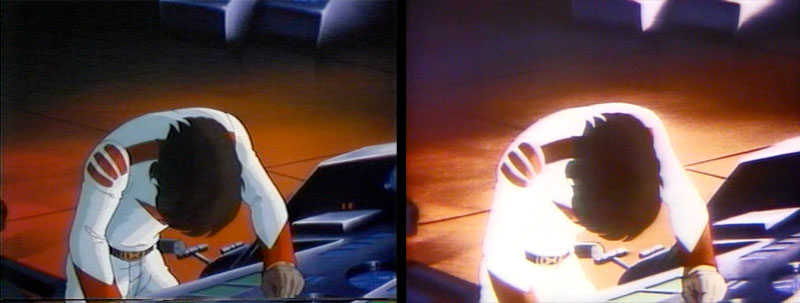
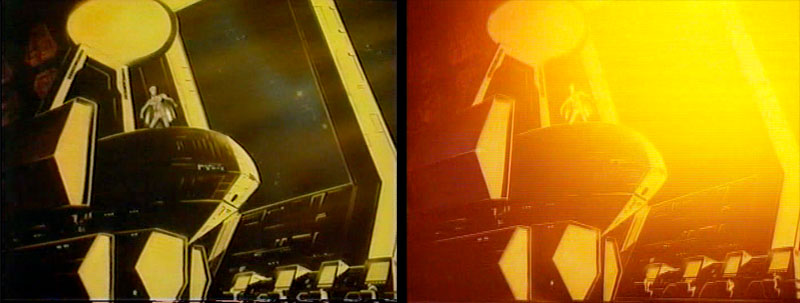
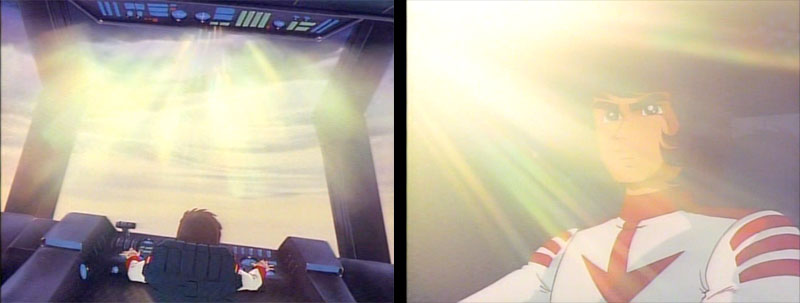
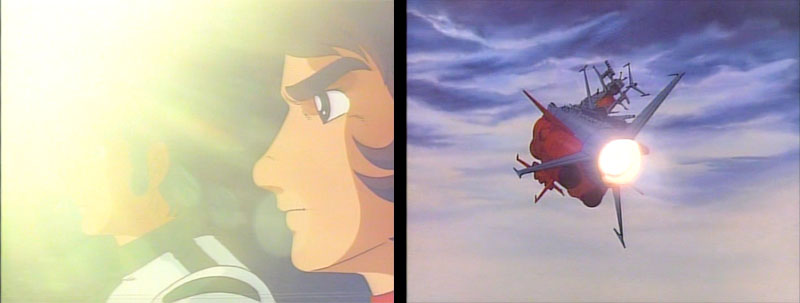
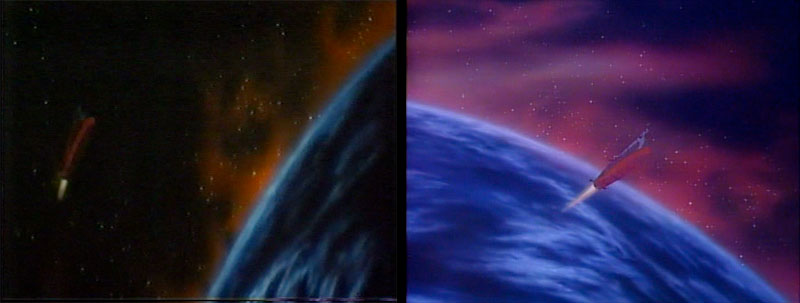
Captain Okita takes off on his solo flight toward destiny against noticeably different background paintings.
Another interesting alteration: in Version A he raises his hands in prayer. In B, the hands stay offscreen.
The first two shots of the approaching Aquarius also differ from Version A to B. Unlike some previous shots, however, the rings are present and accounted for.
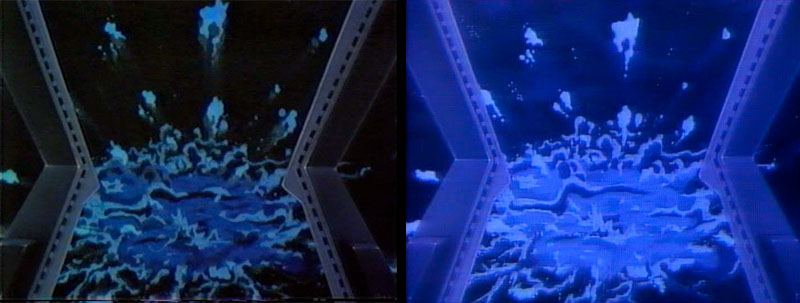
Next begins one of the most demanding scenes in anime history. The Aquarius flood was incredibly intricate and took a long time to play out. At best, the animators could manage only two cels a day, which put the movie even farther behind schedule than it already was. Understandably, then, Version A shows a lot of errors, such as a foreground cel layer that didn’t fill the entire frame.
In all cases, these scenes were heavily enhanced with color and mist effects for Version B. This served to smooth out a lot of the mistakes.
One of the few scenes from this sequence that was entirely redone: a huge body of water lifts off the surface of Aquarius. Version B offered a much wider view.
As a massive deluge strikes the Earth, things look hopeless. What can one space battleship do against such an onslaught?

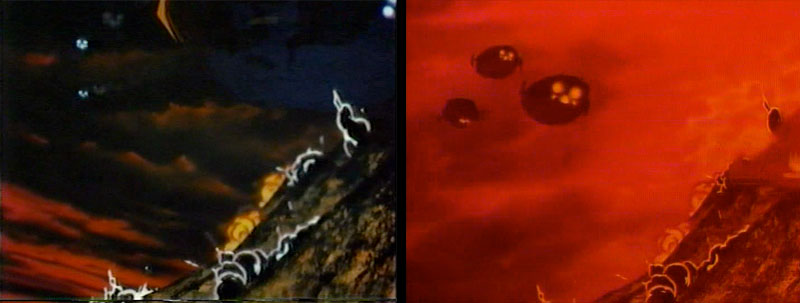
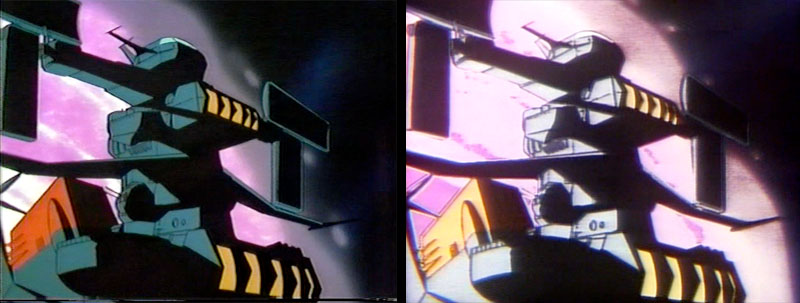
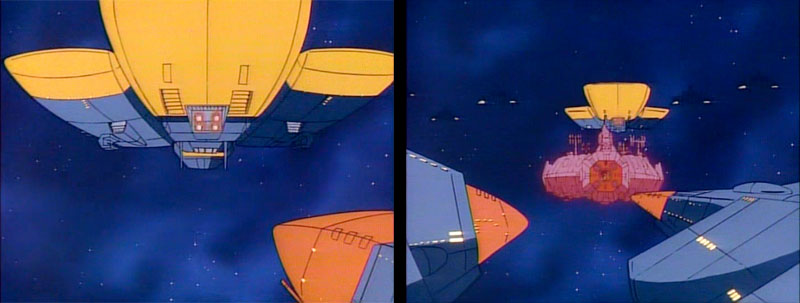
Lugal is prepared for unwelcome guests. He powers up his Robot Horse, which gets a caption in Version A. The horse was fully-painted in Version B.
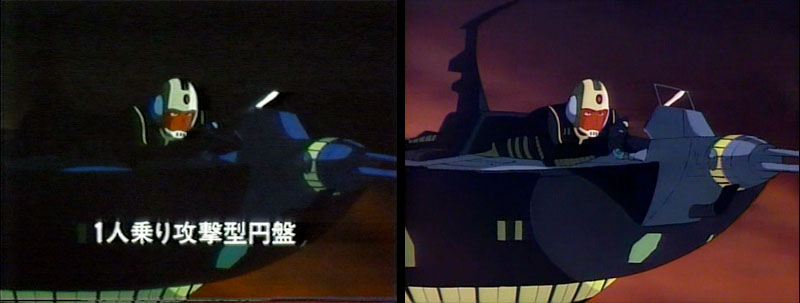
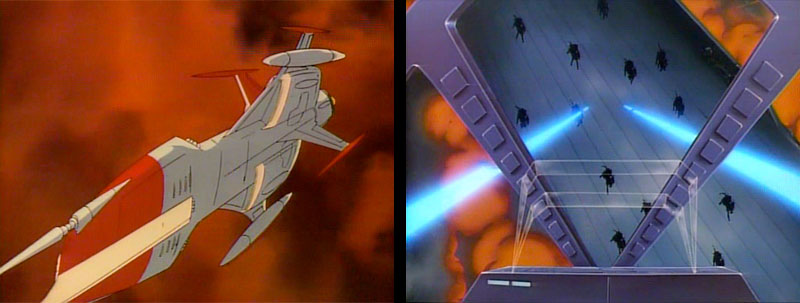
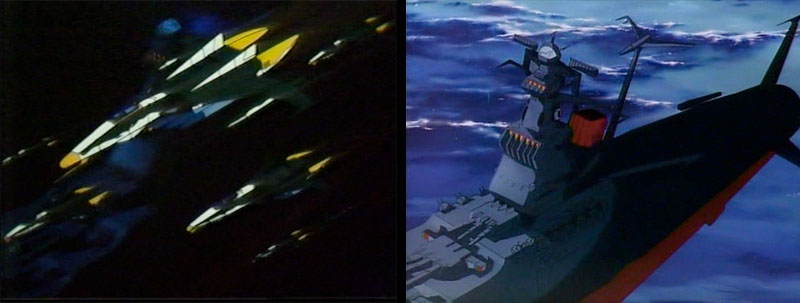
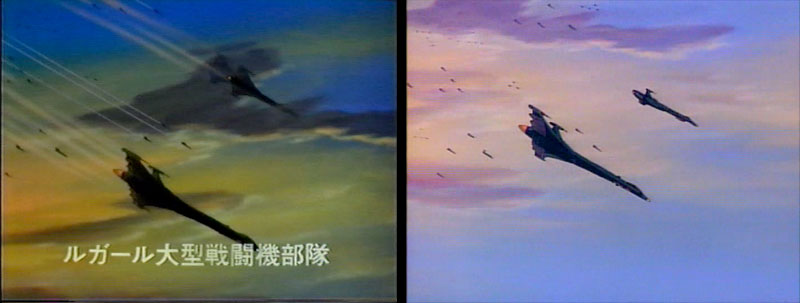
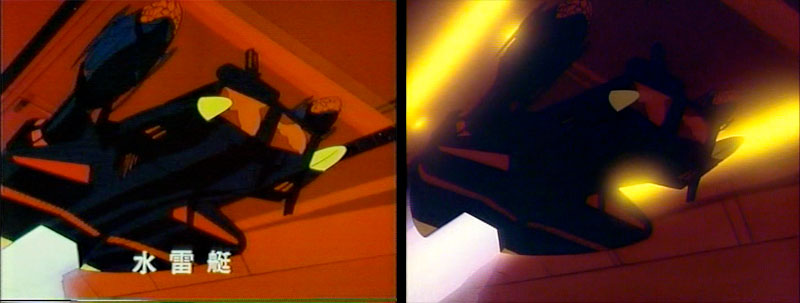
Also in the Dinguil arsenal are one-man flying attack platforms, as captioned in Version A.
The platforms close in on the crash-landed Yamato for a firefight with the crew on deck. The scene shown above left was new in Version B. They start firing, and one of them nails Shima with a mortal blow.
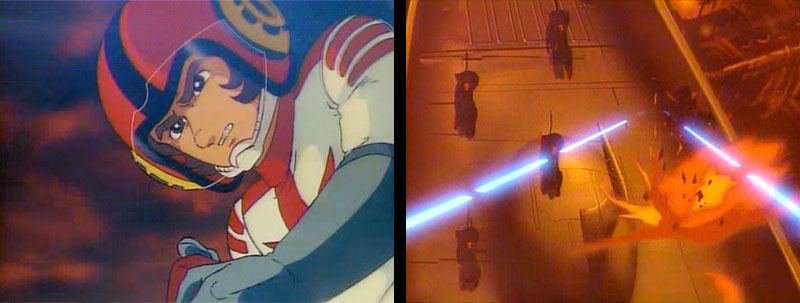
Kodai orders Shima back to the bridge and launches in the Cosmo Zero. In Version A he simply flies to his next stop. Version B adds a few scenes of him strafing Lugal’s phalanx of Robot Horses.
Following this, Kodai spots the warp beams firing on Planet Aquarius and turns all his efforts toward stopping them. This is where Versions A and B converge again.

Despite mortal wounds, Shima struggles mightily to support Kodai’s effort. After doing his part, he pauses for a memory of more pleasant times with his little brother. As with all previous scenes involving Jirou, these were new to Version B.
Even if you haven’t seen the movie yet, you probably know where this is going…
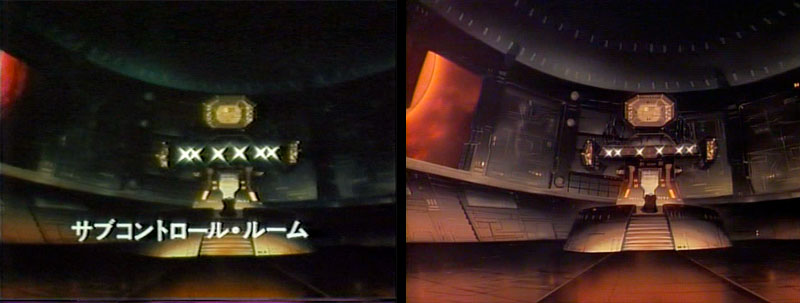
His plot thwarted and his City Satellite crumbling, the Emperor falls back on plan B: propel Aquarius toward Earth with his other warp generator from the Sub-Control Room. As usual, it is captioned in Version A only.
His next move is to escape in his ancient spaceship, the same one used by early Dinguilians to rescue Earthlings from the Biblical flood. Unfortunately for the Dinguilians, they chose the wrong Earthlings. Those jerks turned on their kindly hosts and mutated their culture to its present aggressive state. So really, this story is about chickens coming home to roost.
Version B gives us a closer look at one of these ships before cutting inside. This intermediary shot is not in version A, but Lugal is in both.
Uruk starts to explode. The colorful background of this shot in Version A was removed from Version B.
The next scene also differed quite a bit from A to B with the ships climbing away into a blood red background.
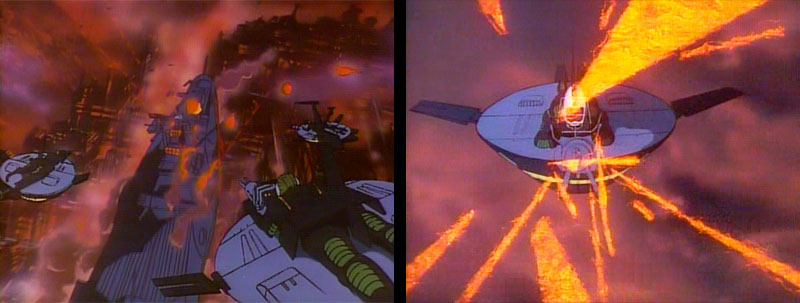
This color scheme continued into a shot of Yamato trying desperately to rise as Uruk collapses beneath her.
Ultimately, Yamato falls straight through the crumbling Uruk before powering up. This was another case of heavy color enhancement in Version B.
The final destruction of Uruk is quite different from A to B. Version B preserves more detail and closes with the satellite splitting in half as shown below. Version A just ends with a big glowing ball of energy.
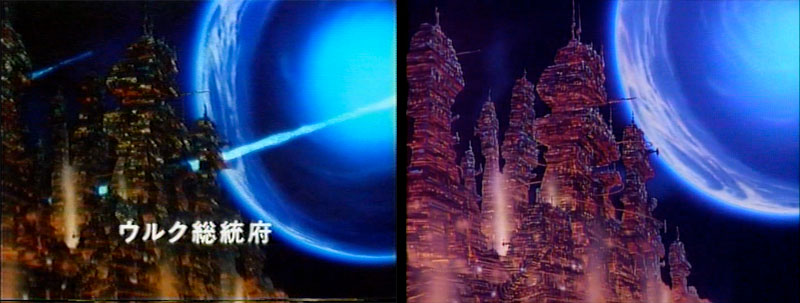
Establishing shots of City Satellite Uruk, completely different from A to B.
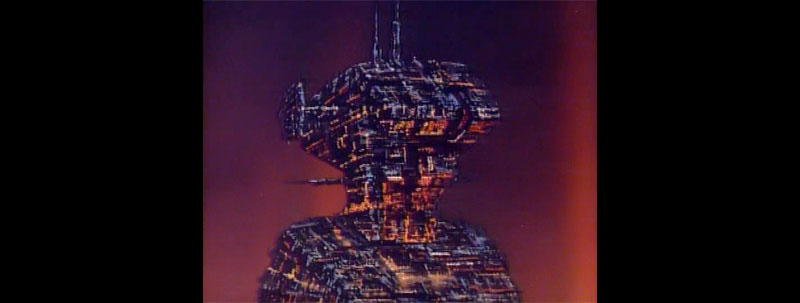
Version B included an extra shot of Emperor Lugal’s Giant Tower of Evil Management Inc.
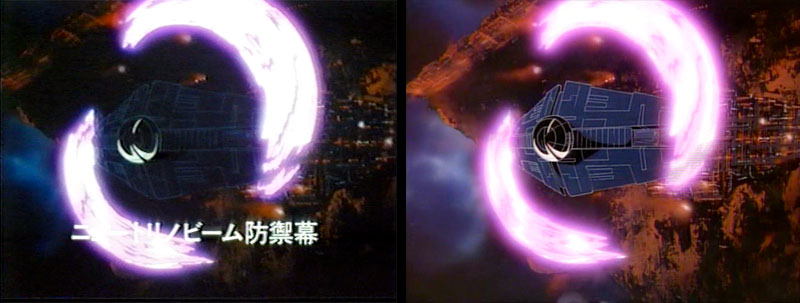
As Yamato approaches, the Emperor orders the Neutrino Beam generators to power up and form a protective shield. They are captioned in Version A.
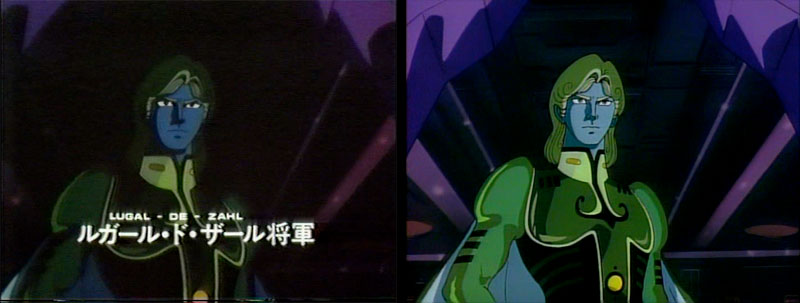
Unfortunately for Lugal de Zahl, his father raises the shield before he can land, which puts him on the wrong side of the door. He realizes this in these two new shots from Version B.
Above left is another new shot from B. This sequence was much simpler in Version A and included the reaction shown above right. In both versions, Lugal is vaporized in his head-on crash and we instantly see the neutrino shield as bad news.
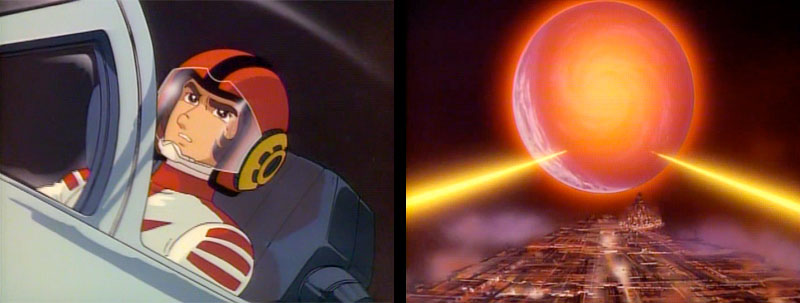
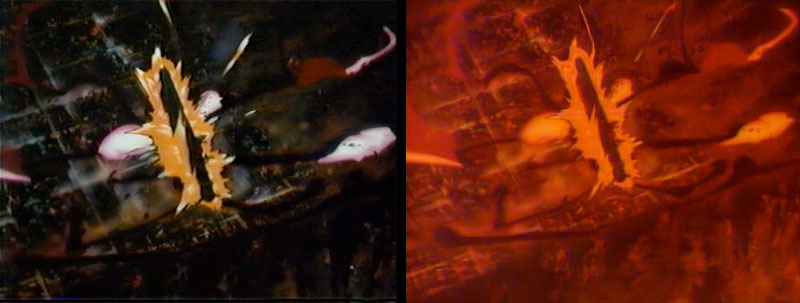
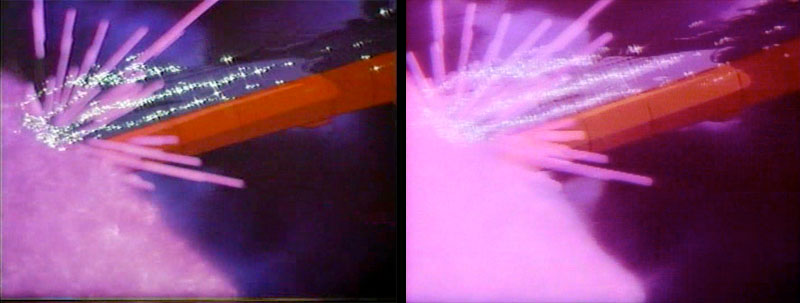
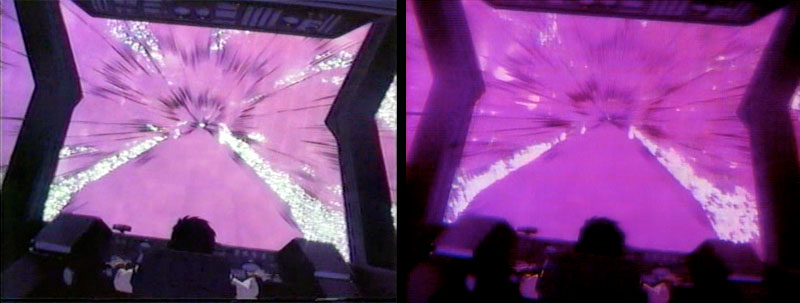
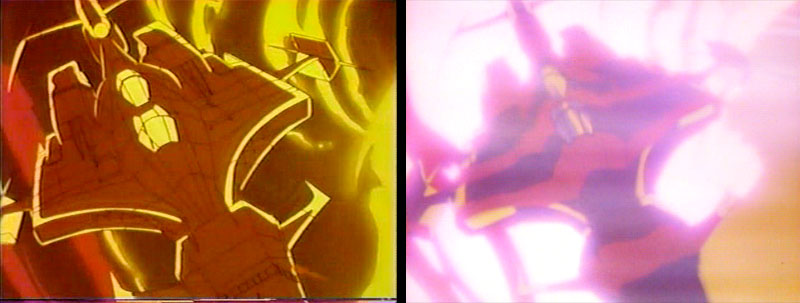
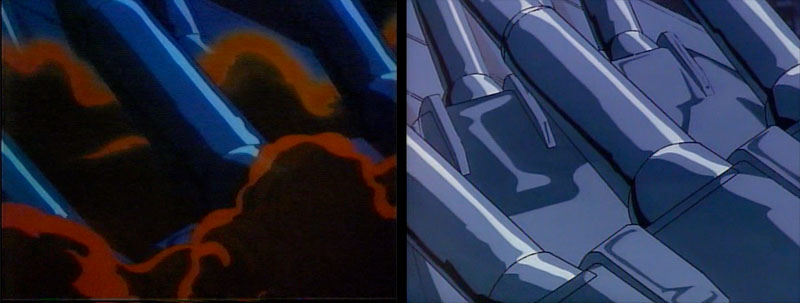
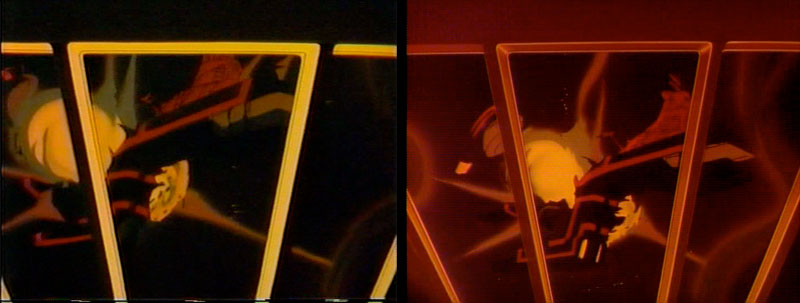
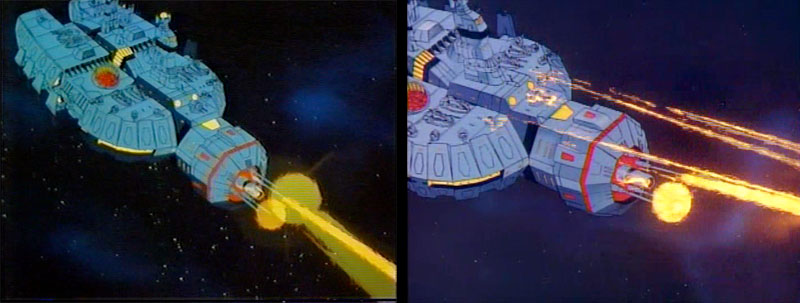
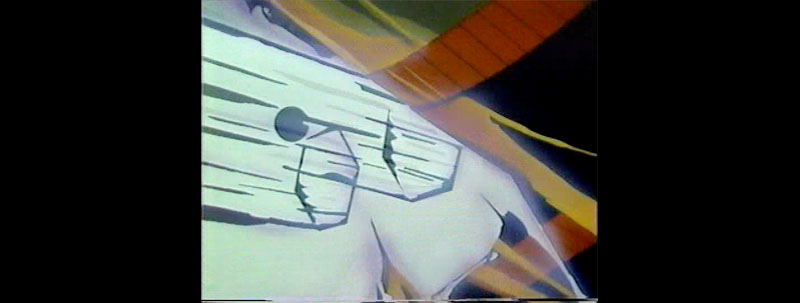
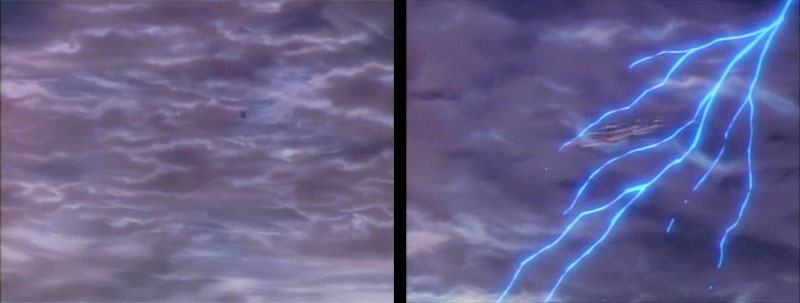
Yamato turns in time to avoid Lugal’s fate, but a huge ball of glowing neutrino energy is fired at the ship. This is the beginning of a sequence that was highly enhanced with “solarization” effects in Version B. This is a video process that creates some unusual artifacts, as we will see.
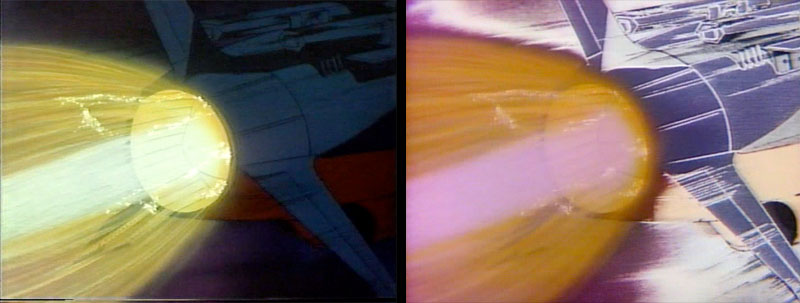
Yamato‘s engines power up to full blast as the energy approaches. Version A featured the straight animation. Version B color-blasted the sequence with solarization that probably looked better on a movie screen.
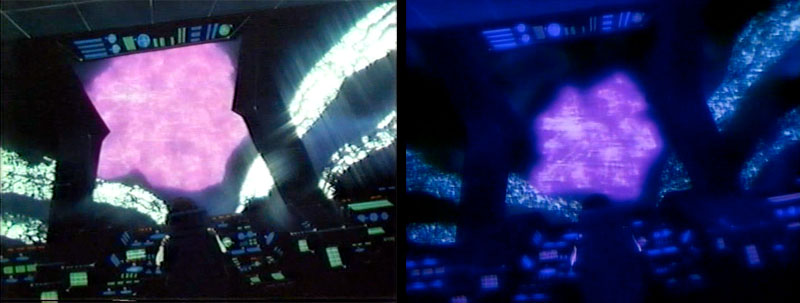
The treatment continued inside the bridge. It’s possible that the film-to-video transfer boosted the contrast even more, giving it a truly eye-scorching look.

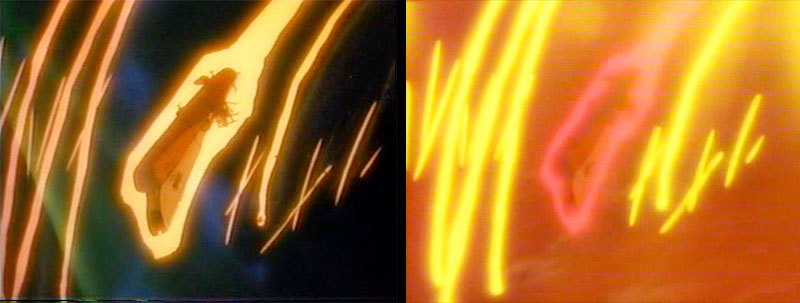
Things look utterly hopeless as the ship is overwhelmed…but then turns out to be protected by a cocoon of Wave-Motion energy. That was lucky!

Glowing with the power of righteousness, Yamato climbs up out of the blast and begins a huge arc back down toward Uruk. All these scenes were color-shifted for Version B.
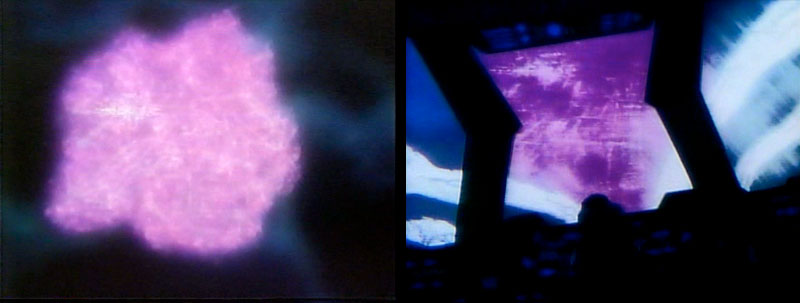
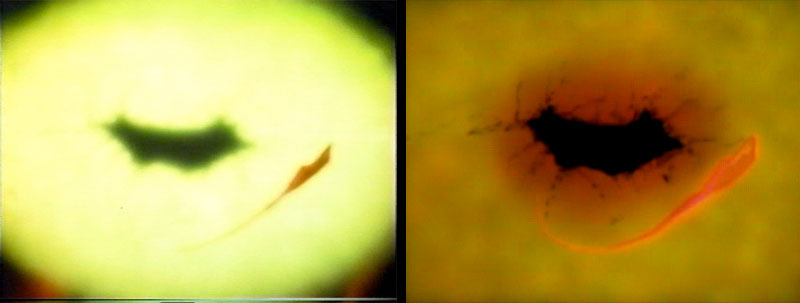
Here the two versions diverge briefly. Version A cuts outside the ship for a view of Uruk surrounded by neutrino energy. B stays inside the bridge for the approach.
Yamato thumbs its nose at the neutrino shield and plunges straight in.

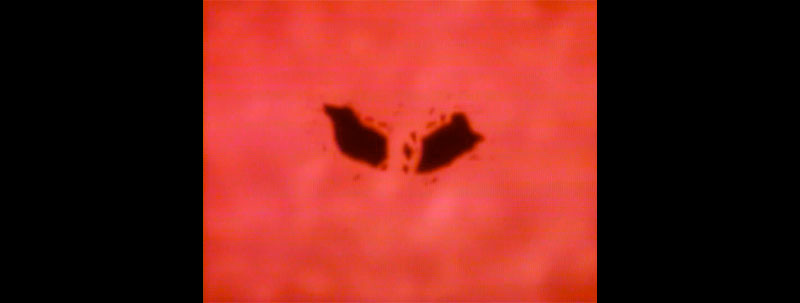
Next stop, Emperor Lugal’s front porch!
En route to Aquarius, Shima writes a letter to his brother, still trying to keep his spirits up. Like the previous scene with the two brothers, this is unique to Version B. Version A simply goes to an establishing shot of Aquarius that is not kept in Version B.
Next we go to a reused shot from earlier in the film with Uruk forcing Aquarius into a warp. And as before, only Version A shows the rings around Aquarius.
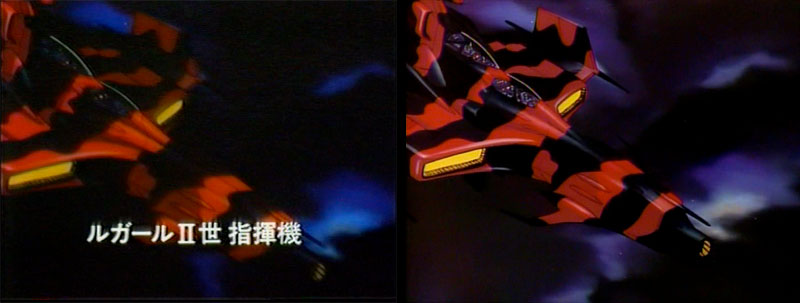
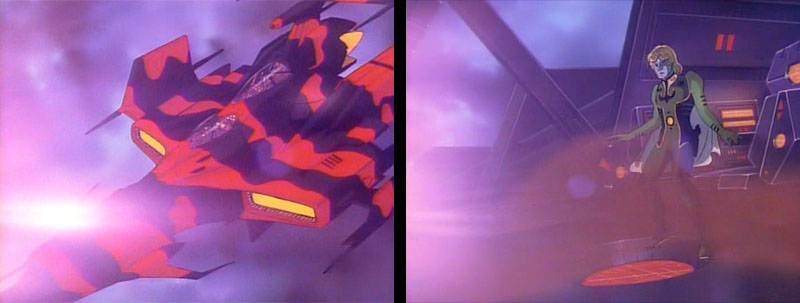
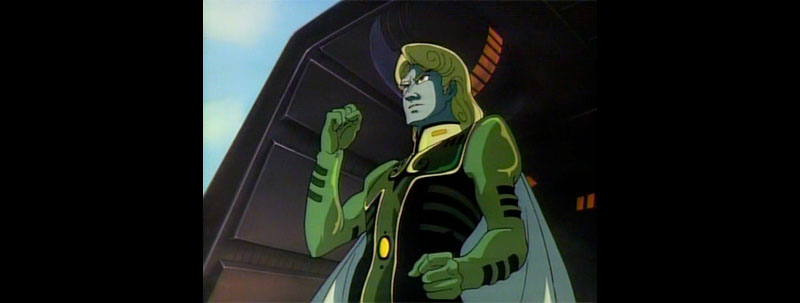
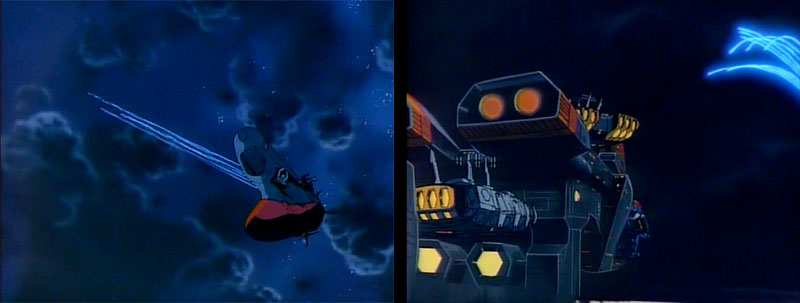
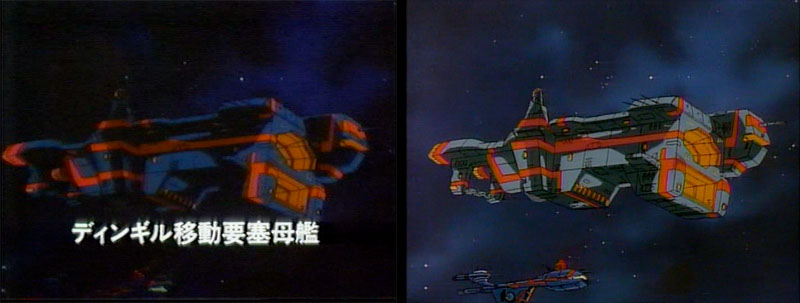
Lugal de Zahl, having returned to his father in defeat, gets a wicked-looking new flagship and goes out on the prowl for a rematch with Yamato. As usual, the ship only gets a caption in Version A.
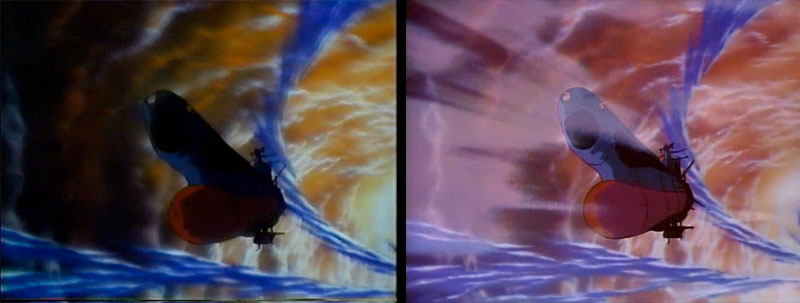
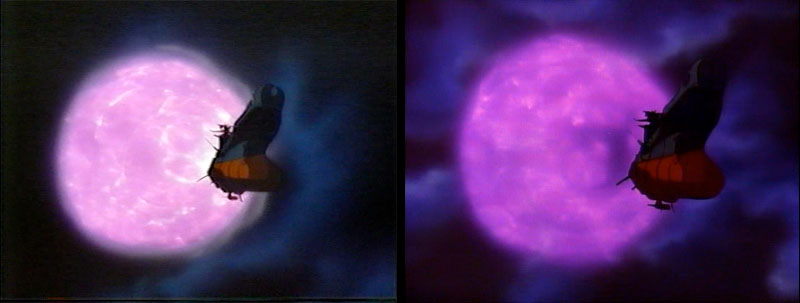
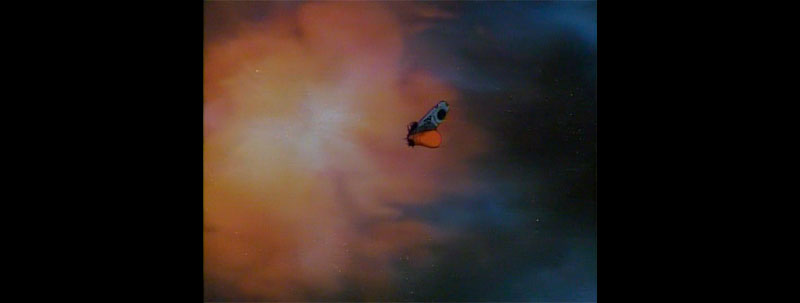
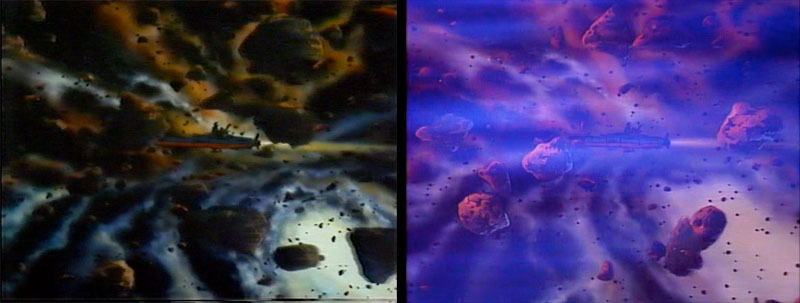
Yamato warps into a vast interstellar cloud which is enhanced in Version B with mist effects.
Planet Aquarius materializes, getting a caption in Version A and a color enhancement in Version B.
Yamato approaches, launching a set of probes. The background in Version B is a much better match for the surrounding scenes.
Yamato continues past the camera and in Version A a squadron of Cosmo Tigers gains into the shot. They are deleted from Version B.
The Tigers fly on ahead of Yamato in Version A, but are nonexistent in B.
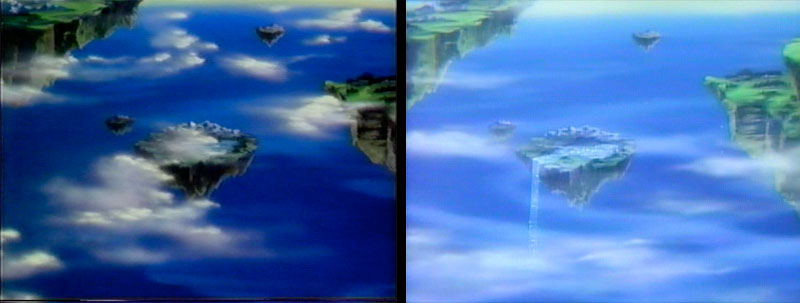
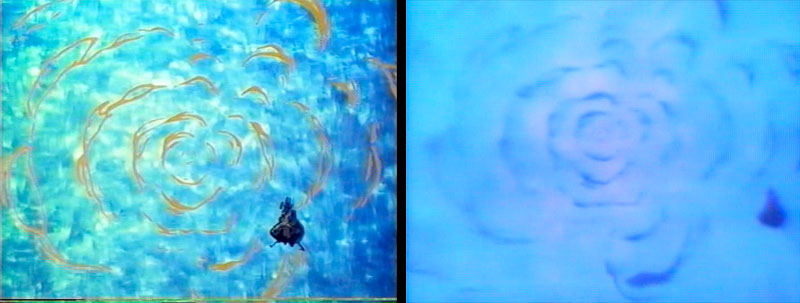
Next we go to some beauty shots of Aquarius’s floating continents. This is the only scene changed from A to B: cloud cover was removed and a waterfall was added to the “Rene Magritte” continent.
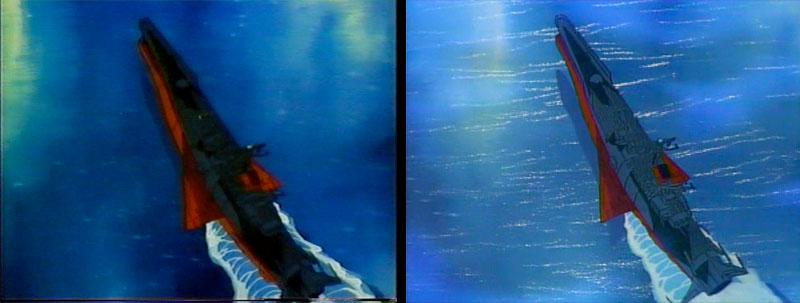
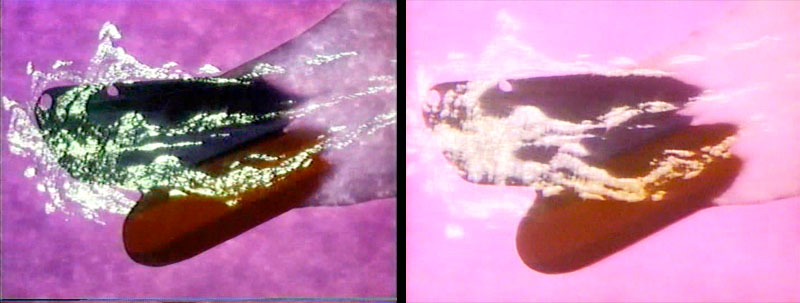
Yamato sets down in the water, which is enhanced with glittery effects in Version B.
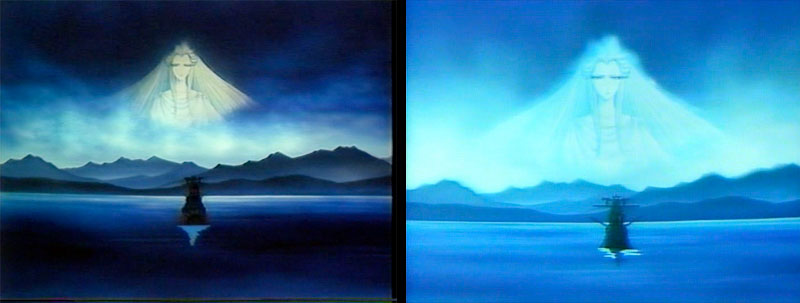
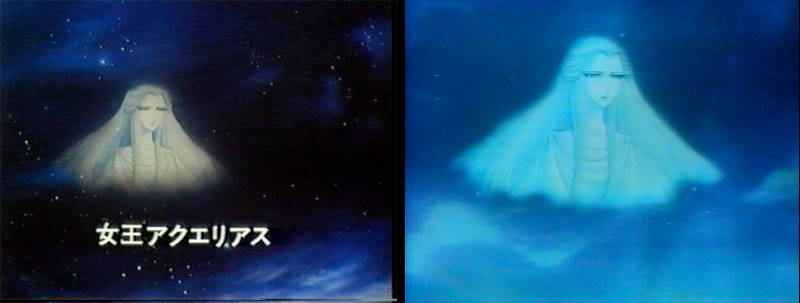
The Queen of Aquarius appears and explains her planet’s role in the dawn of life across the galaxy. Version B is much brighter and mistier than A, and the Queen’s caption is deleted.
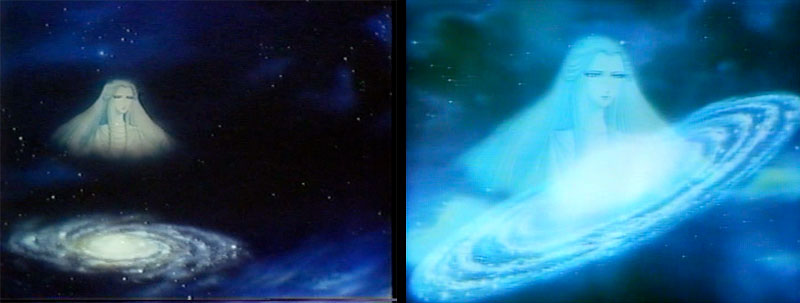
Galaxies float past the Queen as she speaks, changed quite a bit from A to B.
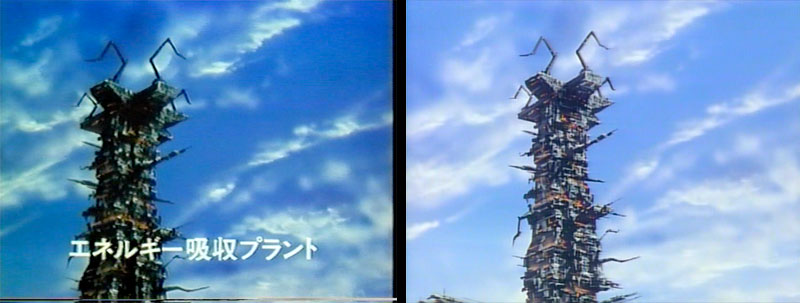
Remember those Cosmo Tigers that flew on ahead? They report the sighting of a Dinguil energy plant in both versions, but it only gets captioned in Version A.

Lugal’s new fleet quietly closes in. The art in this scene is the same in both versions, but the timing and movement are opened up in B.

Three new scenes from inside Lugal’s command ship for Version B.
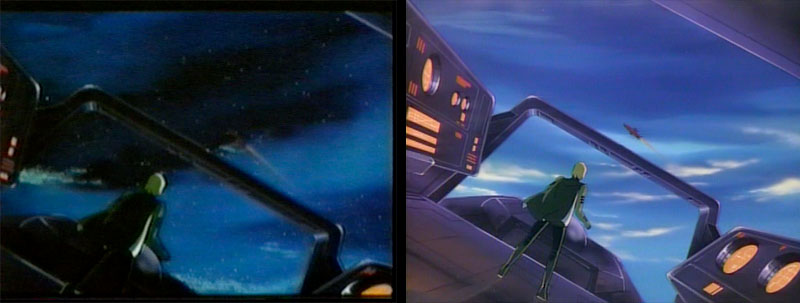
Lugal spots Yamato rising away from the surface. Version B is wider and has different background art.
Yamato engages the enemy and leaves exploding ships in her wake. Version B gave these shots different color effects and background art.
An additional wide shot of the battle from Version B.
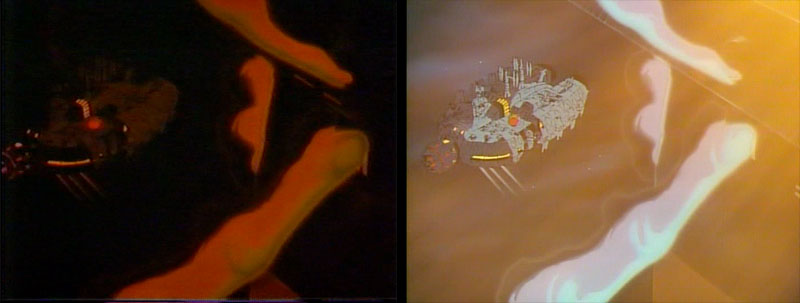
Backed into a corner, Yamato lets fly with the Wave-Motion Gun and cleans Lugal’s clock. The scene of his command ship escaping was quite different from A to B.
A explosive chain-reaction gains on Lugal’s escaping ship. It was almost invisible in A, greatly enhanced in B.

Lugal’s ship flew out of a white cloud in A that was repainted purple in B.

The new version of the scene in B was extended to include Yamato breaking out of the purple cloud in hot pursuit.
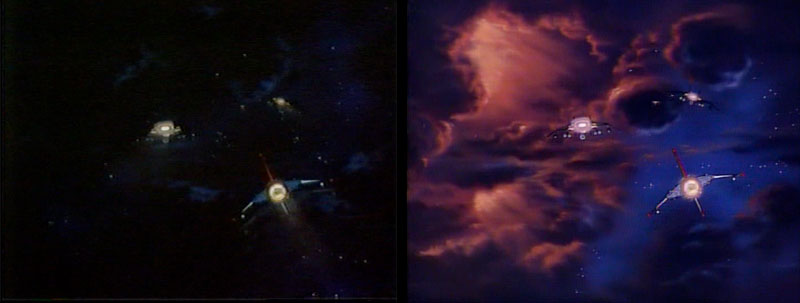

Yamato‘s fighters fly into action. In Version A they fly into dark, empty space. Version B is enlivened by more colorful, dramatic backgrounds and mist effects.
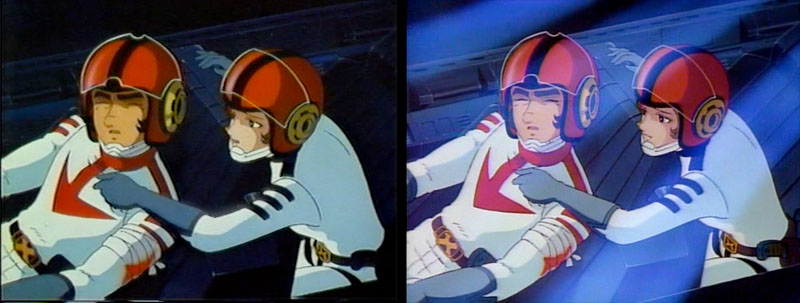
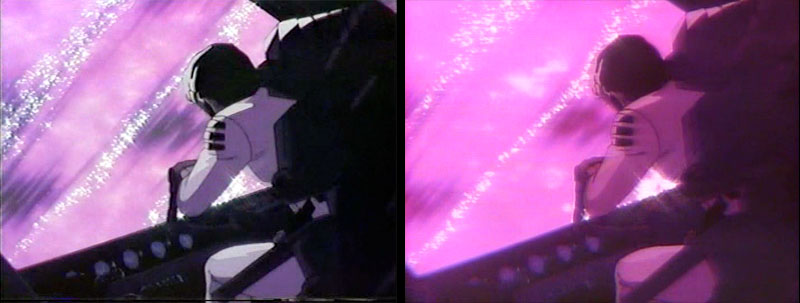
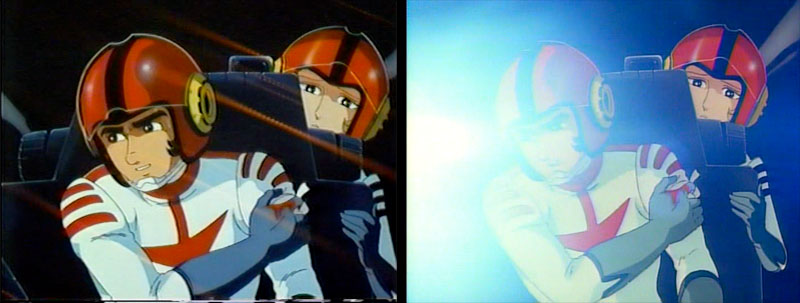
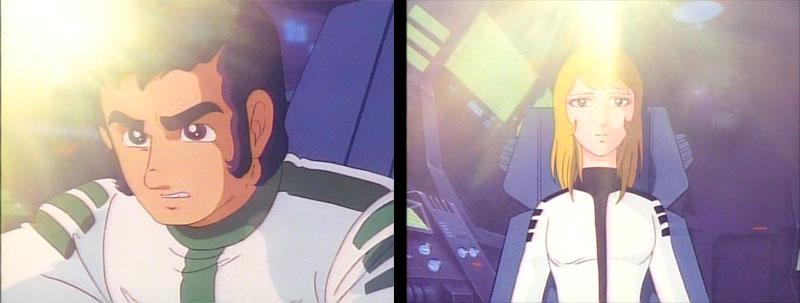
Kodai and Yuki fly into a dogfight together and he is wounded by shrapnel. Fortunately, the Cosmo Zero’s canopy is not breached for some reason. Version B adds mist effects to these cockpit scenes.
Following the dogfight, Yamato‘s guns rotate to deliver the knockout blow against Lugal’s fleet. Yamato took some hits, and smoke flows through the scene in Version A. It was deleted in Version B.
The guns fire. The frame shown above left is the same in both versions. The beams arc down toward the Dinguil ships in a new scene for Version B.
Kodai watches the fireworks, relieved. The fireworks shine much brighter in Version B.
Version B also inserts a couple extra scenes of destruction as the ships explode and collide.
Lugal De Zahl watches his ships go down in flames. The flames burn much hotter in Version B.
Lugal’s view of the carnage is framed and colored differently from A to B.
Lugal’s ship turns to escape. Version B adds lighting effects to make this more visible.

The closing shot of this sequence is vastly different from A to B.


Kodai and Yuki fly on ahead of Yamato to scout for more enemies, leading into a song sequence that revisits some romantic moments from the past. Here we get a strange artifact from Be Forever, part of which was animated in widescreen format. The widescreen scenes are compressed in Version A, then corrected with an anamorphic lens in Version B. (That part of Be Forever has been a problem for home video since day one.)

Yamato parts with the remnants of the EDF fleet (apparently just one ship) and sets course for Planet Aquarius. The departure shots are completely changed from A to B.
The final shot of this sequence is slightly different; some of the landscaping on the surface of Pluto has been repainted.
Another Dinguil carrier gets a caption in Version A as the assault on Earth begins.
Fighters scream down into the atmosphere, captioned in Version A only.
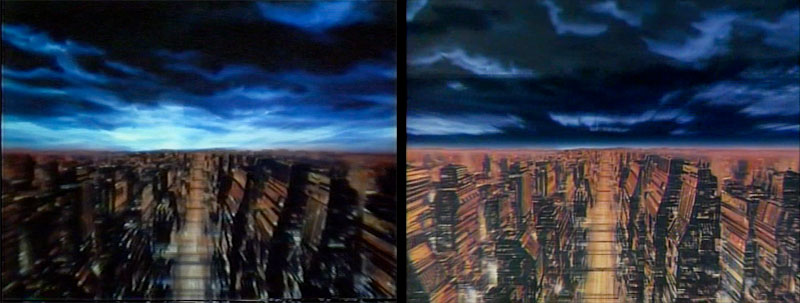
Following the attack we cut to a vista of the destruction, quite different from A to B.
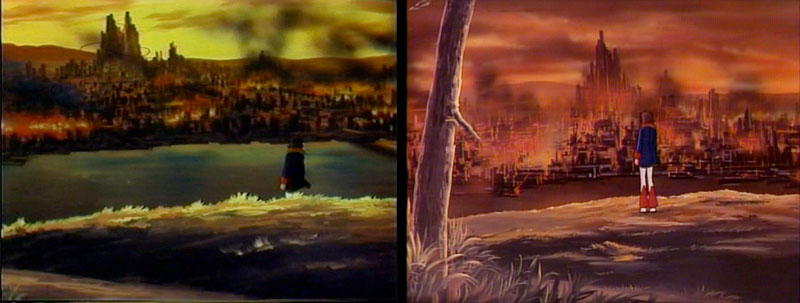
The shot pans over to the lonely figure of Kodai pondering his failure.
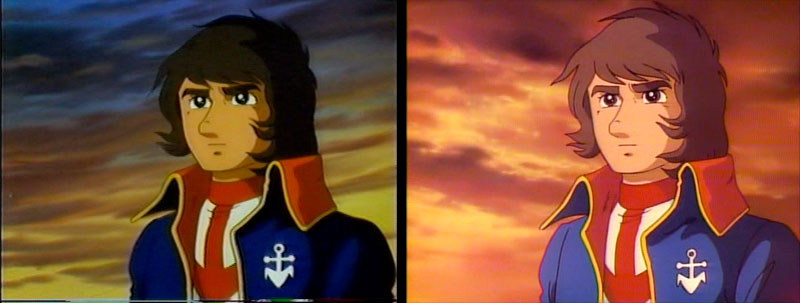
The background of the next shot was changed in Version B to reflect the new color palatte.
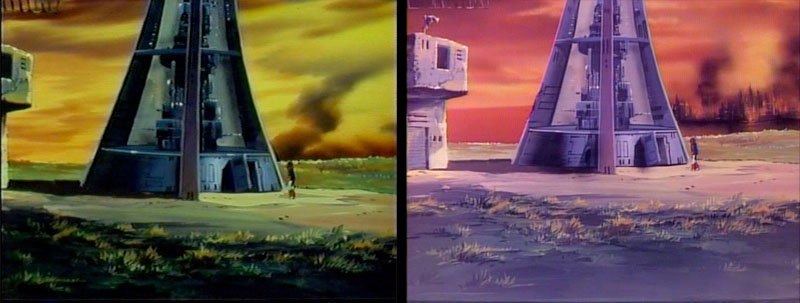
Kodai walks to the tower leading down to Yamato‘s underground dock. The foreground art is unchanged, but the background and overall color are different in B.
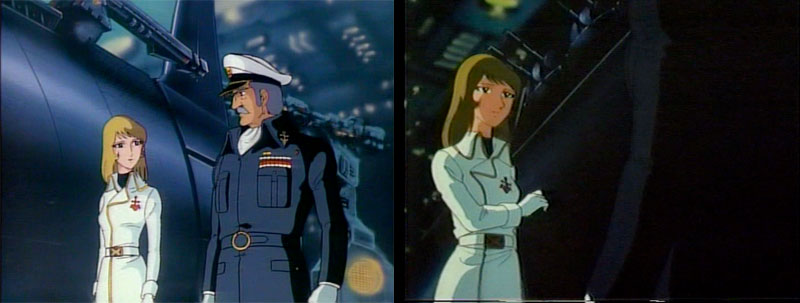
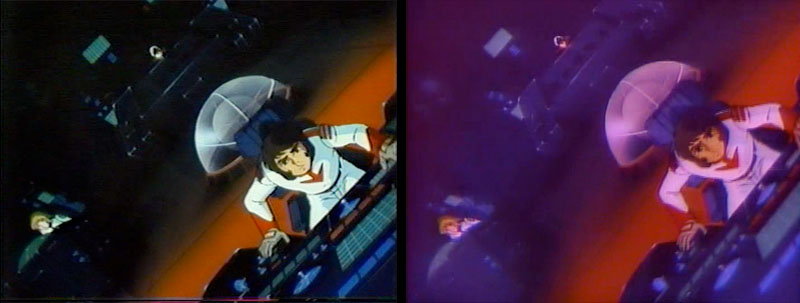
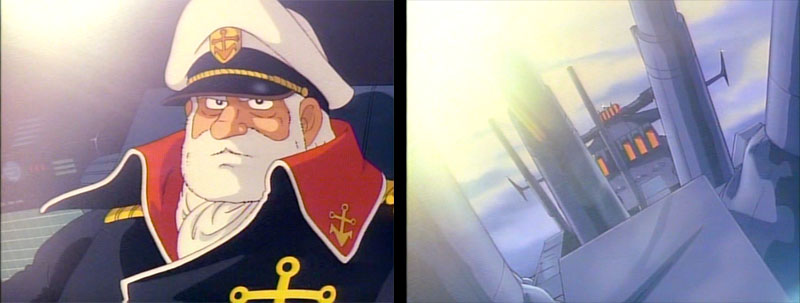
The crew gathers at the dock and rushes onto the ship when they hear a surprise announcement from the revived Captain Okita. Both versions have Yuki share a knowing glance with Commander Todo, but only in Version A does she salute him before joining the others.
Todo salutes the departing Yamato. The scene was redone for Version B.
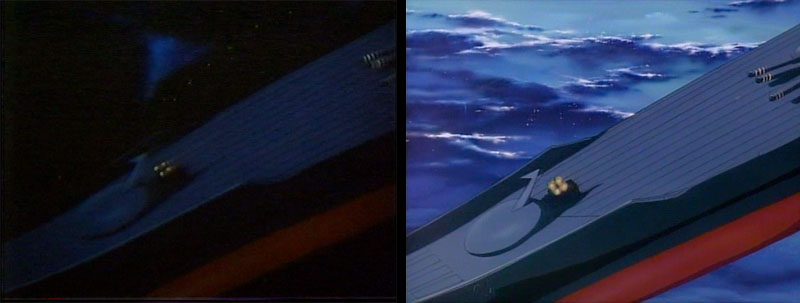
Wide shot of Yamato leaving port. Version B was considerably brighter and included some extra clouds.
The liftoff from the water is essentially the same in both versions, but from here they deviate.
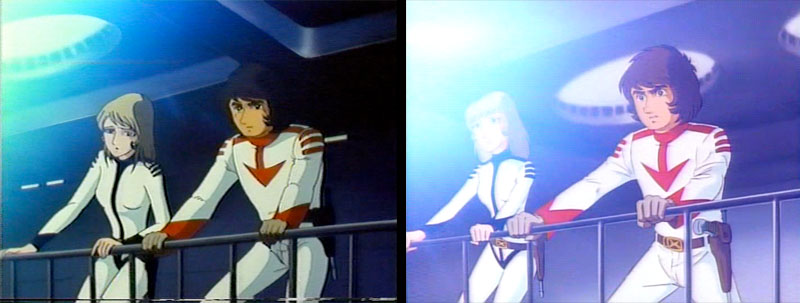
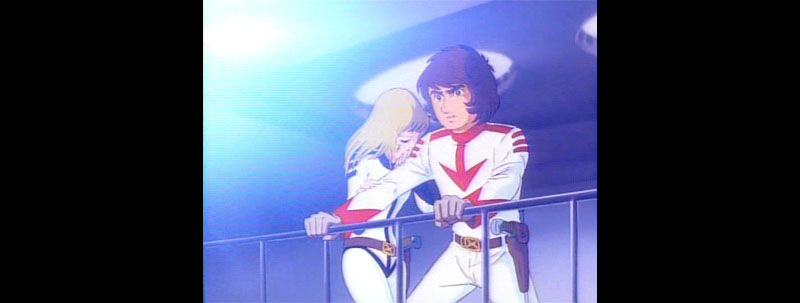
For one thing, the sky is much brighter and more hopeful in Version B.
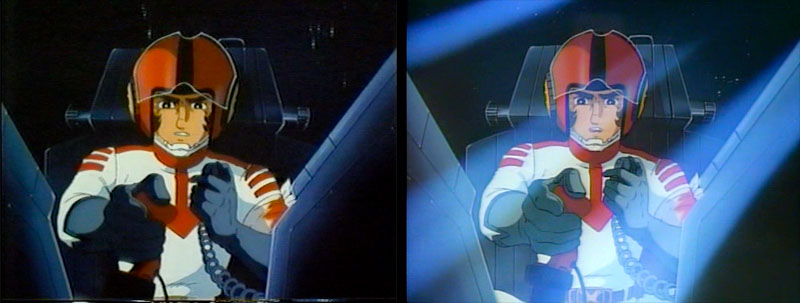
Version B also cuts inside the bridge for key shots of the main characters, full of grit and determination. This lengthens the Version B launch quite a bit. More shots shown below.

All of the above were new to Version B and gave Yamato‘s final launch the screen time it cried out for.
Version A mainly relied on climbing shots from Farewell to Yamato, as sure an indicator as any of how rushed the animators were.
After the launch, both versions inexplicably cut to a reused scene from Farewell showing the ship with damage.
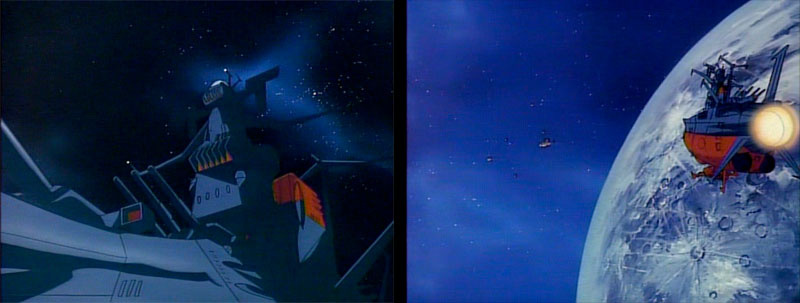
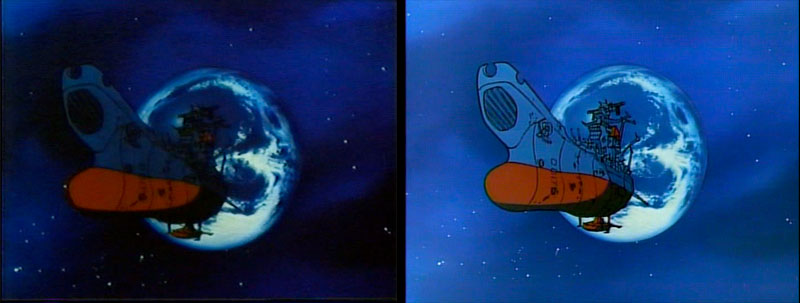
Version B then gives us two more new shots which bracket dialogue scenes inside the ship. By the end of this sequence, we’re passing the moon to rendezvous with another EDF fleet on its way to action in the outer solar system.
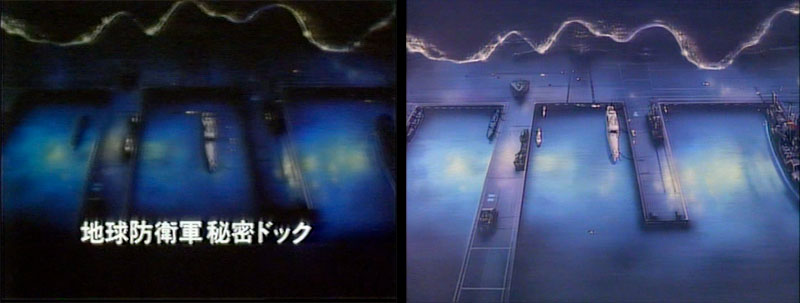
Yamato limps home after its first attack by Lugal de Zahl and rests in a giant underground EDF ship dock. It gets a caption in Version A.

A newly-minted EDF fleet rises to intercept the approaching Dinguil task force. The caption was dropped from Version B and the sky colors were brightened.
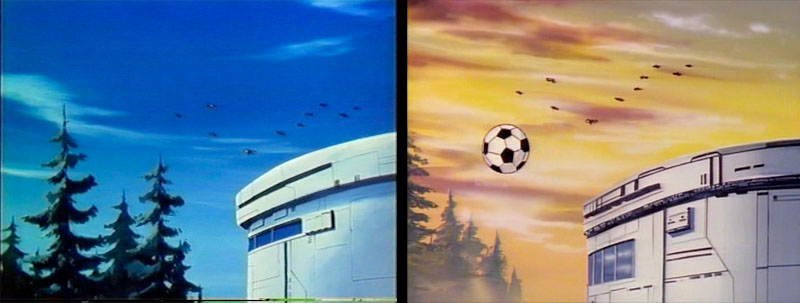
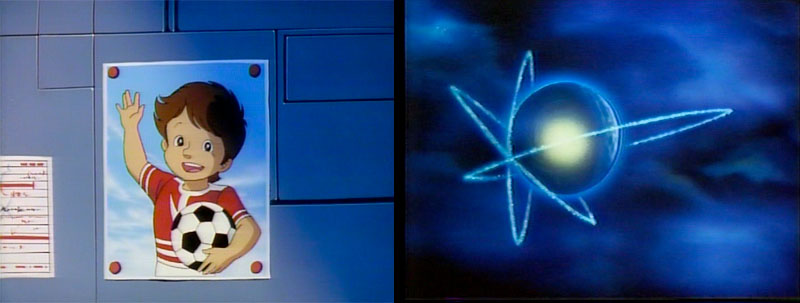
In Version A we see the ships from the ground. In Version B the shot is changed and a soccer ball flies through.
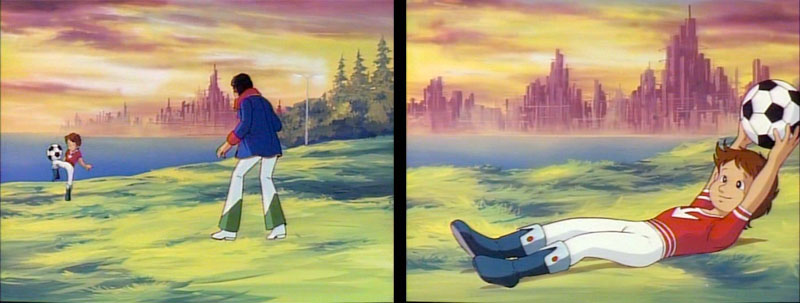
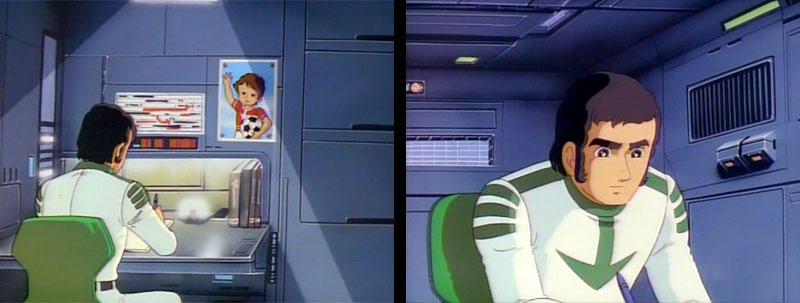
This leads us to an entirely new scene for Version B; Shima and his little brother Jirou (AKA Jordy Venture) have a rare playful moment together.
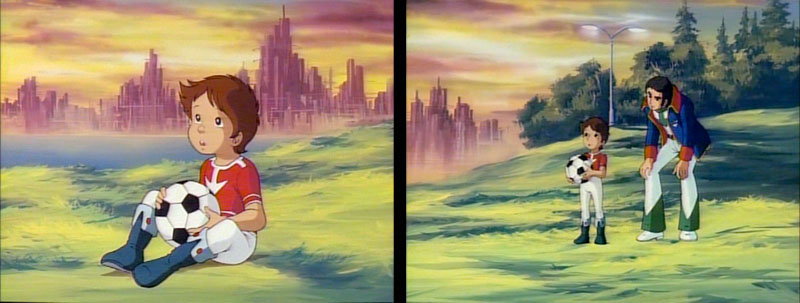
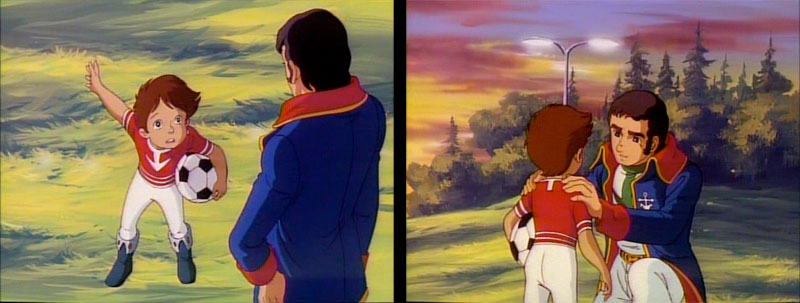
Shima does his best to reassure his little brother that everything will be fine, but we the audience instinctively know better, don’t we?
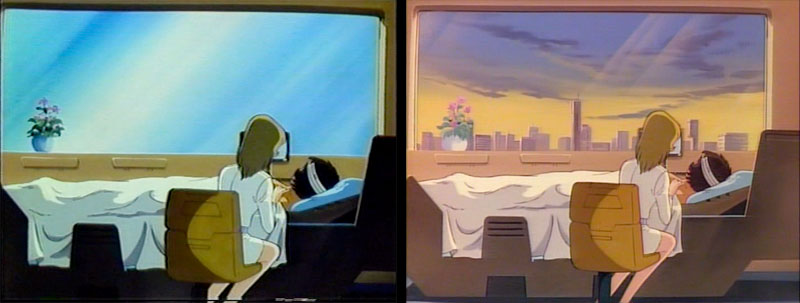
Cut to Yuki tending Kodai in the hospital. The view outside his window is considerably improved in Version B.
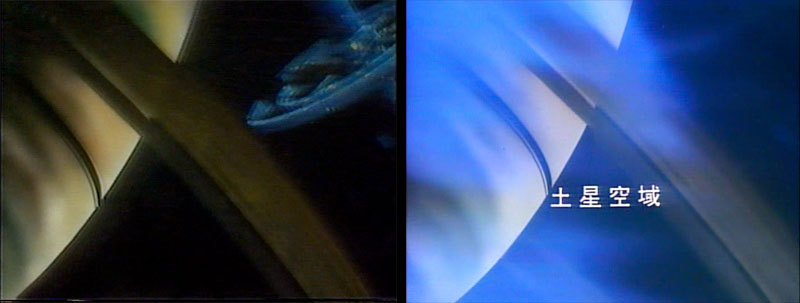
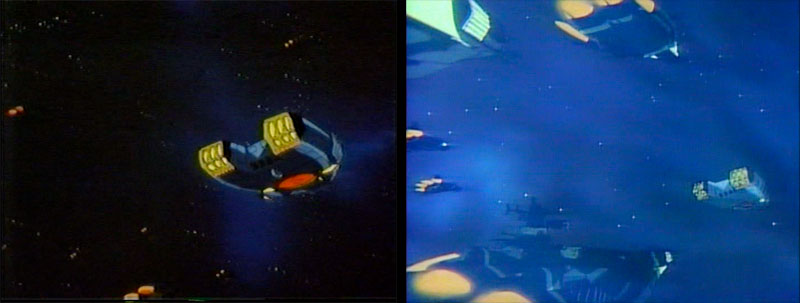
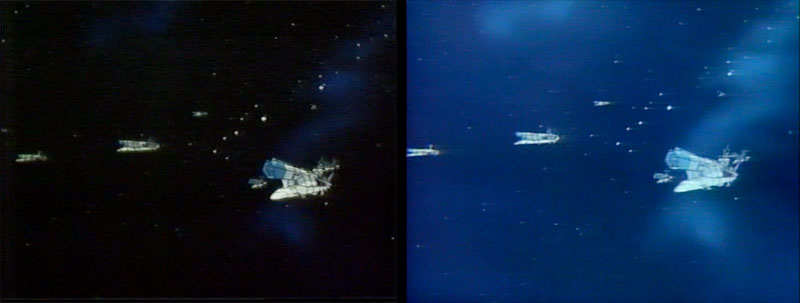
Meanwhile, in outer space we have two quite different scenes. Version A puts a space colony closer to Saturn. Version B puts them farther apart and enhances the scene with mist and a caption.
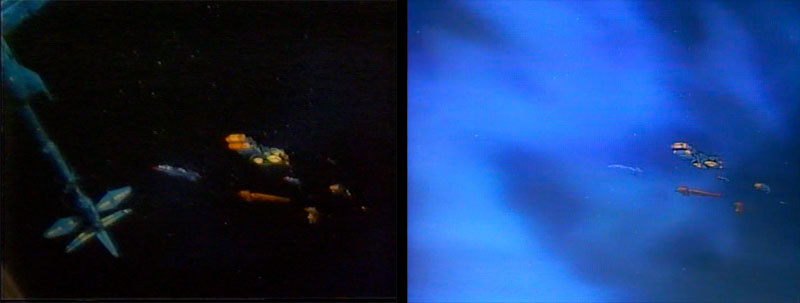
The shot then pans to the right for a look at the Earth emigration fleet. Version B includes the space colony, but the shot is opened up much wider.
A new shot from Version B: the Dinguil task force warps into the midst of the emigration fleet.
Lugal’s command ship opens fire. The shots are framed differently in A and B.
The Dinguil ships cut down the emigration fleet with ease and charge on ahead. They are closer together in Version B and the scene is enhanced with mist effects.
Cut to a Dinguil carrier, which is captioned in Version A.
A rare example of a scene that appeared only in Version A: closeup of a fighter firing up its engines inside the carrier
The fighter itself is shown launching in both versions, but is only captioned in A.
The EDF battlefleet closes in. Mist effects enhance the scene in B.
A hyper-radiation missile hits the lead EDF battleship. The radiation effects are different from A to B.
The EDF fleet falls quickly. The closing shot is changed considerably from A to B.
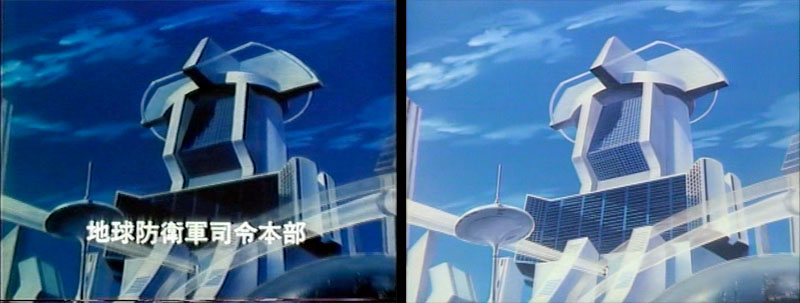
We cut back to Earth. EDF Headquarters gets a caption in Version A.
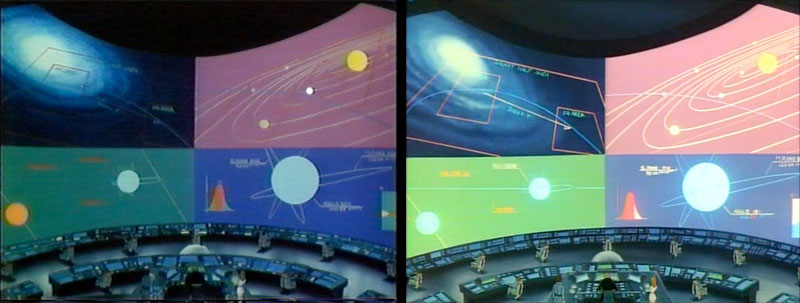
EDF control room: the shot is the same in both Versions except for the upper left quarter of the viewscreen, which is enhanced in B.

EDF Commander Todo reacts to the news of Yamato‘s homecoming. The background is different in Version B and the scene is extended to show Todo turning to his aide.
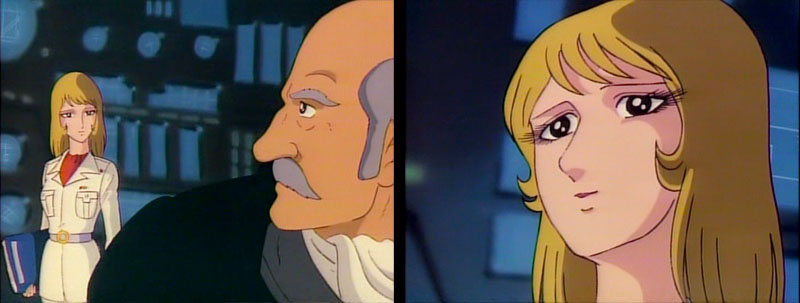
Version B then adds two more shots, giving us our first appearance of Yuki and her signature wistful line: “Kodai-kun…”
Another new shot from B: re-establishing Yamato in space.
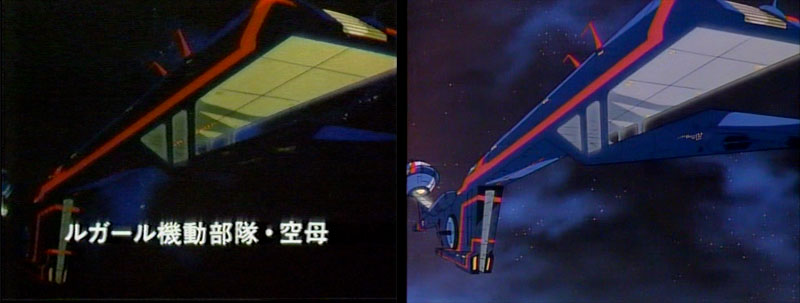
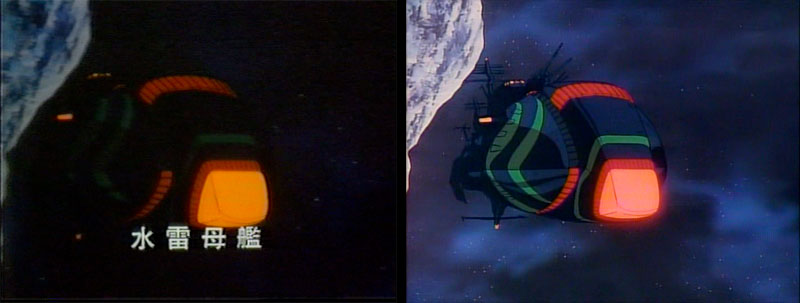
The first look at a Dinguil ship, a massive carrier. It gets a caption in Version A.
Our first shot of an actual enemy, captioned in Version A only.
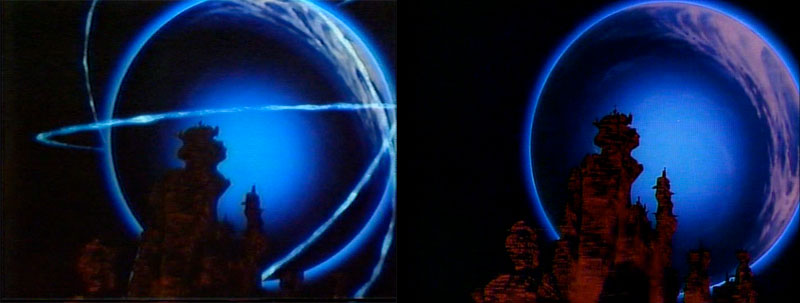
The massive pullback of City Satellite Uruk that establishes its full grandeur. The rings around Planet Aquarius were eliminated for some reason in Version B.
The same shot a few seconds later. Uruk gets a caption in Version A.
A full establishing shot of Uruk, cropped wider in Version B with different cloud layers.
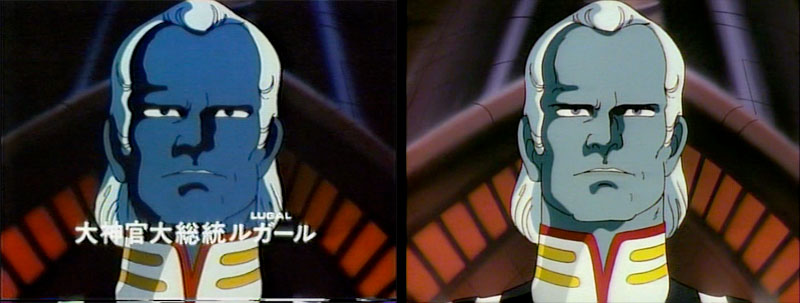
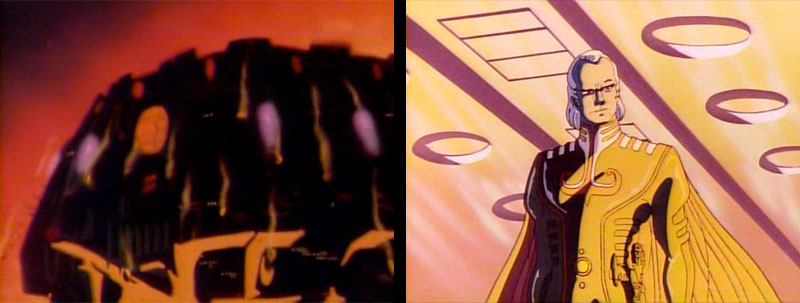
The Big Cheese Emperor Lugal (that’s a very approximate translation!) gets a caption in Version A.
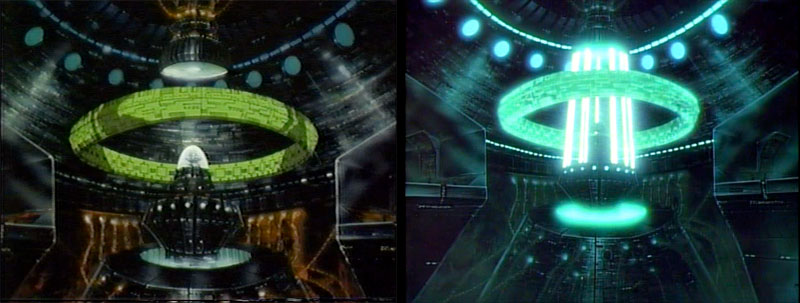
Uruk’s warp generator powers up. Version B featured it in a wider shot with color enhancements.
Uruk hits Aquarius with warp beams. Again, the planet’s rings were left out of Version B.
Here’s the first new material from Version B, another shot of colliding planets. We then cut wide to see their impact
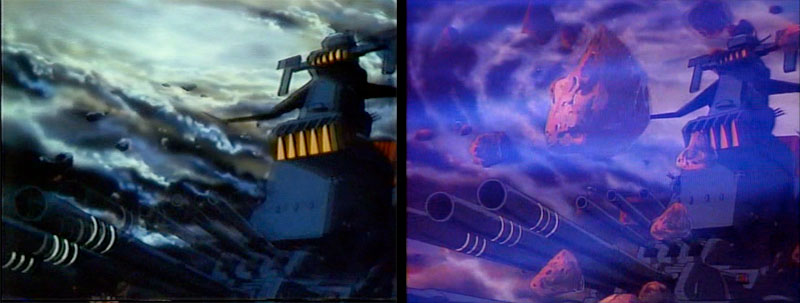
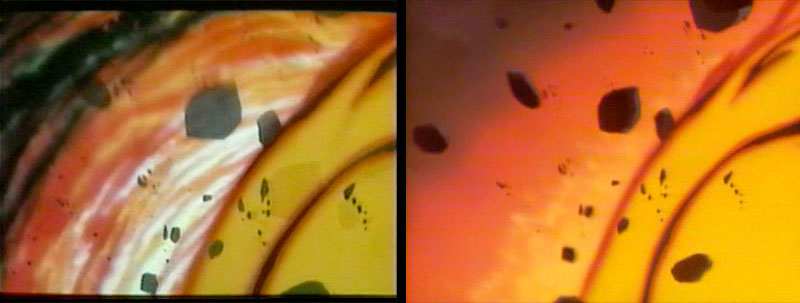
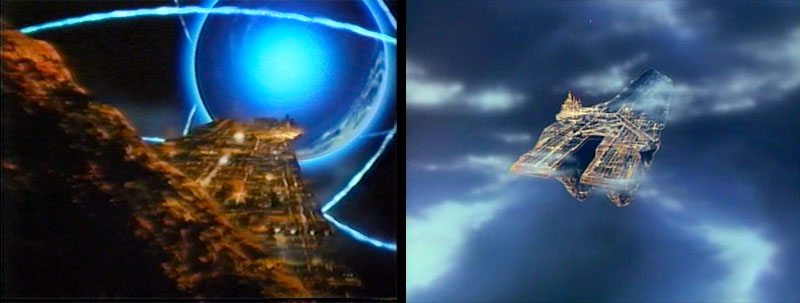
Yamato makes its entrance. The ship art is the same, but the background is positioned differently. Version B also features a swarm of debris and mist effects.
A wide shot shows Yamato pushing through the flying debris. Again, mist effects were added to Version B.
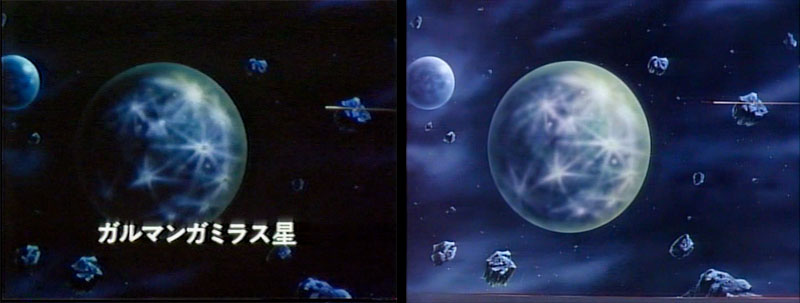
A super-wide shot shows Yamato approaching the Galman-Gamilas home planet. This was the first case of a caption in Version A that was later dropped. There will be many more.
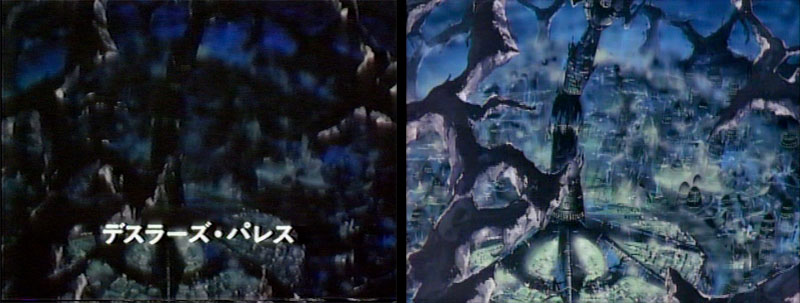
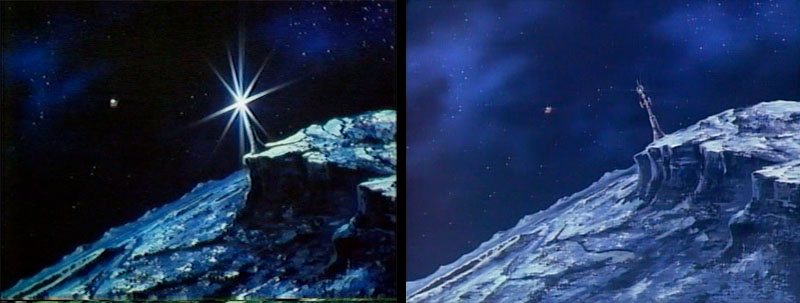
Dessler’s Palace gets a caption in Version A. Both shots pan vertically, but A pans down where B pans up, ending at the top of his leaning tower.
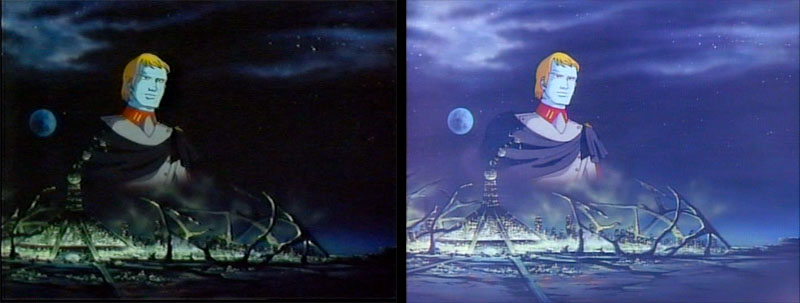
Wide shot of the capital city in ruins. Color enhancement made Version B more visible.
Version B then offers a new shot of a destructive cloud expanding over the surface of the planet.

Yamato flees the expanding cloud, which is color-enhanced in Version B.
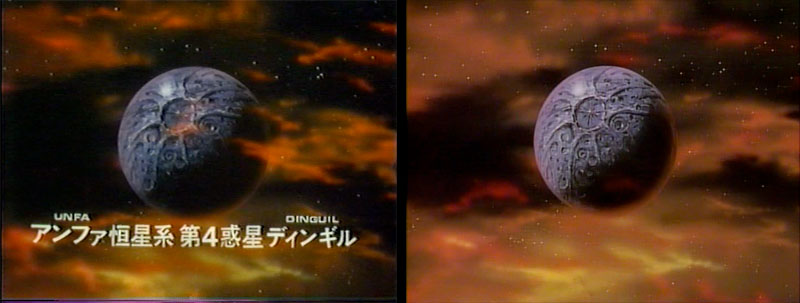
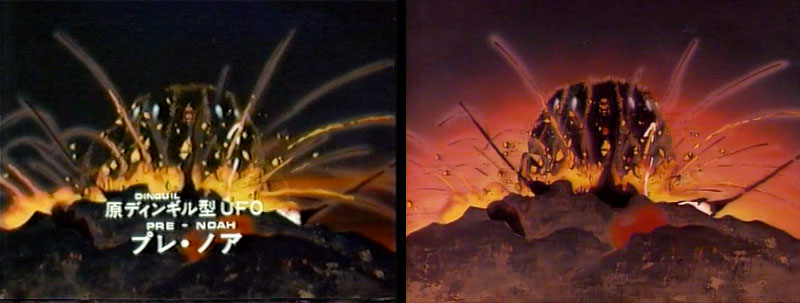
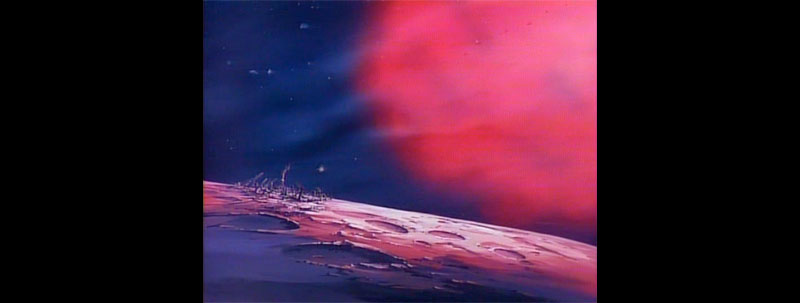
We jump to our next location, which is helpfully captioned in Version A. Such captions were a staple of previous Yamato productions, but this was the first time one included English. The title reads Unfa System 4th Planet Dinguil. Version B dropped the caption and the foreground cloud layer.
Another new shot from Version B: Aquarius drifts into the frame toward Dinguil. By now, the galactic collision isn’t part of the story anymore. We only saw its effect on Galman-Gamilas.

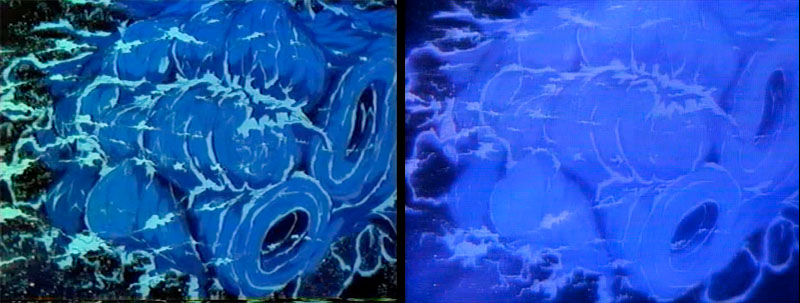
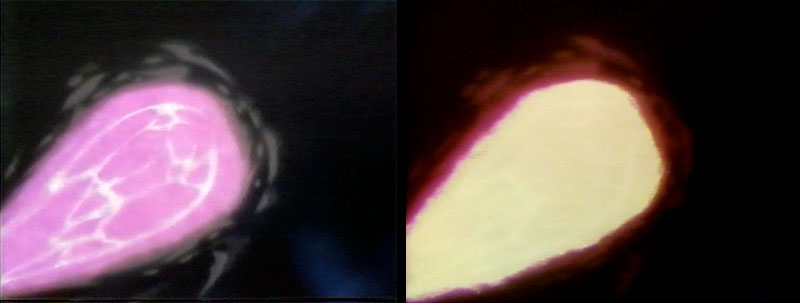
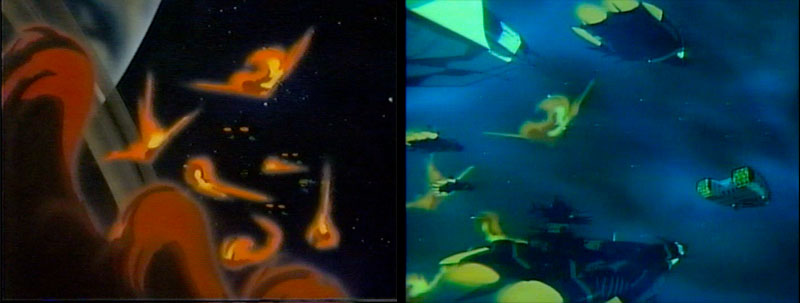
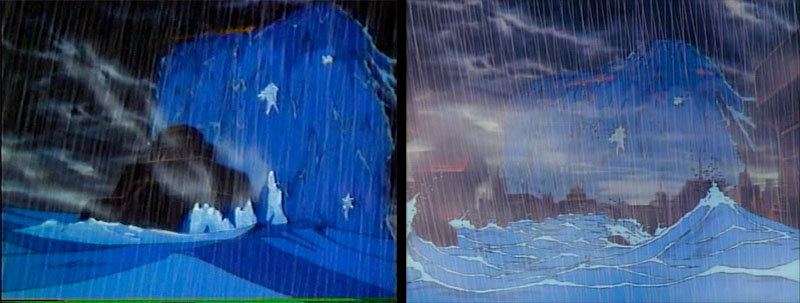
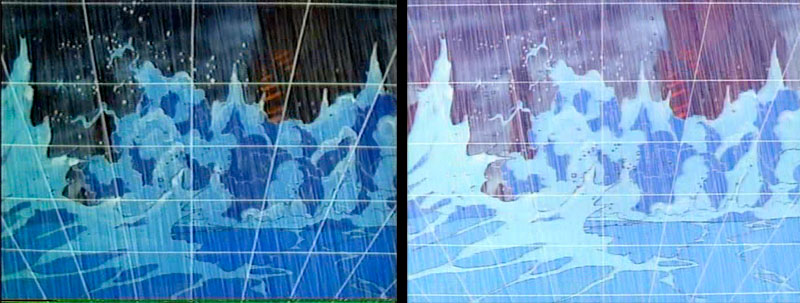
Aquarius unleashes its planetary flood on Dinguil. Color enhancement and mist effects gave it a very different appearance in Version B.

Another new shot from Version B, the roiling waters plunging through space.
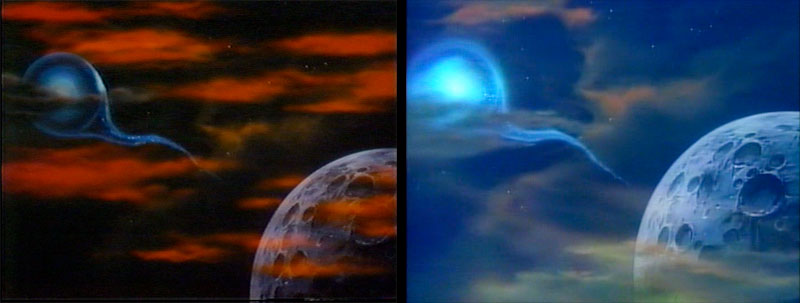
The water tendril stretches out toward the planet. The red clouds were removed from Version B.

New shot from Version B: the water hits Dinguil
The camera flies through a Dinguil city. An extra layer of black clouds was added to Version B to enhance the danger.
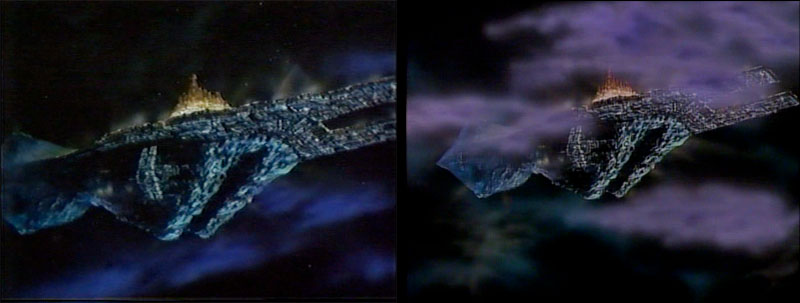
City Satellite Uruk lifts off to escape the flood. The foreground and background art was changed and the shot was widened for Version B.
New shot from Version B: Uruk rises into the stormy atmosphere. But we still don’t get a good enough look at it to know what it actually is.
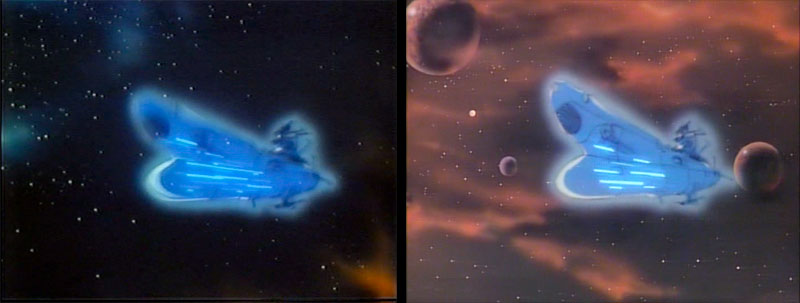
Yamato warps into the vicinity. The background was entirely different in Version B.
A view of Dinguil through the bridge windows. It was repainted in Version B to look flooded.
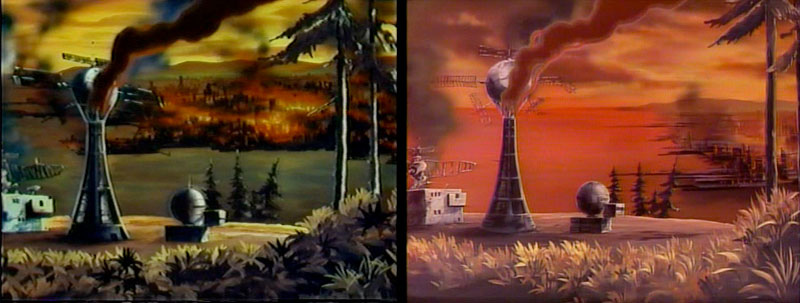
First view of conditions on the ground. The art was the same in both versions, but lightened considerably in B.
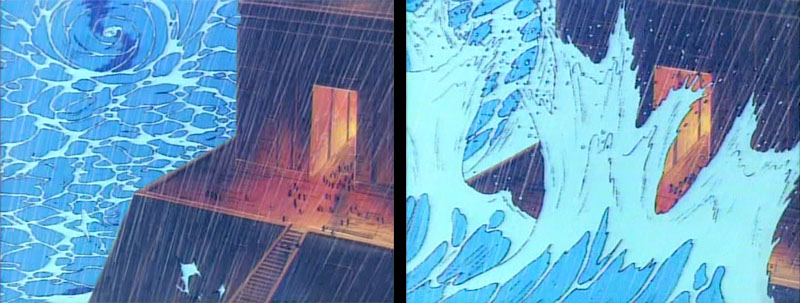
New shot from Version B: the camera zooms in on a temple being flooded.
Two new shots from Version B: Yamato descends into the atmosphere
This was the only descent shot common to both versions, lightened in B.
Another shot new to Version B.
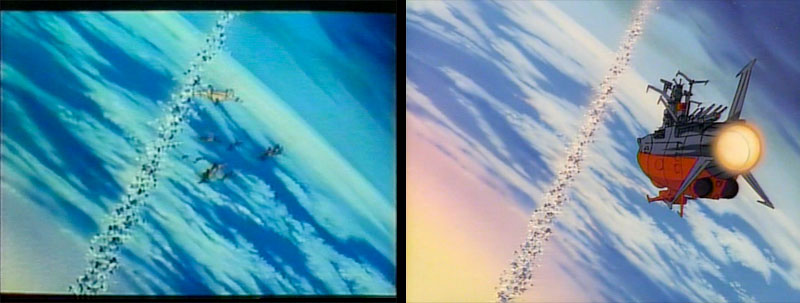
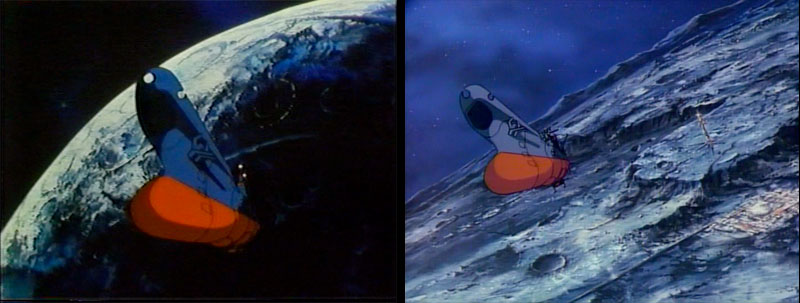
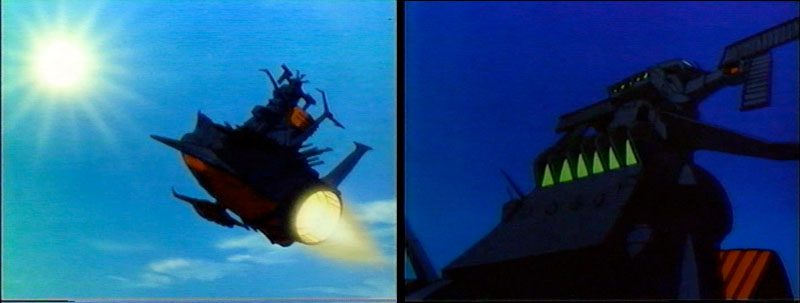
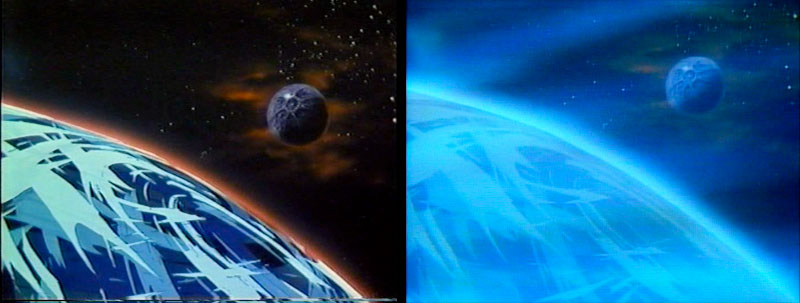
Yamato climbs away from Dinguil in two very different shots. The A version was actually borrowed from later in the film with Yamato soaring over Earth’s moon on the way home.
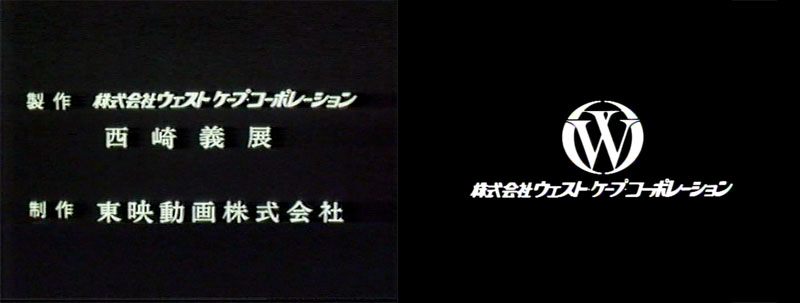
The first change is immediately noticeable in the company credit screens. Both say West Cape Corporation, but only the first includes Yoshinobu Nishizaki and Toei Animation Co.
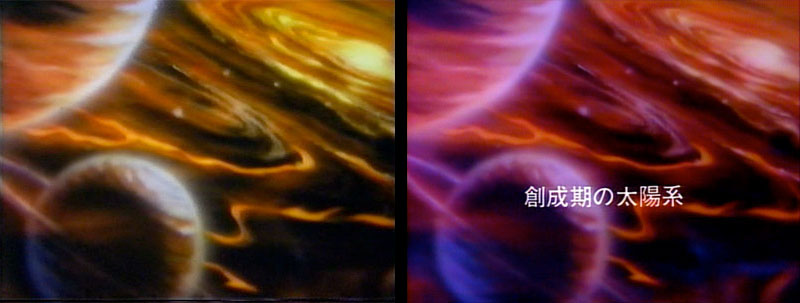
The next one comes up in the first shot of the opening montage. There are numerous color tints that differ between the A and B versions, this one only being the first. Version A is also loaded with caption titles (as we’ll see later on) but in this case there was none. The addition of a caption reading ‘Formation of the Solar System’ was added to Version B.
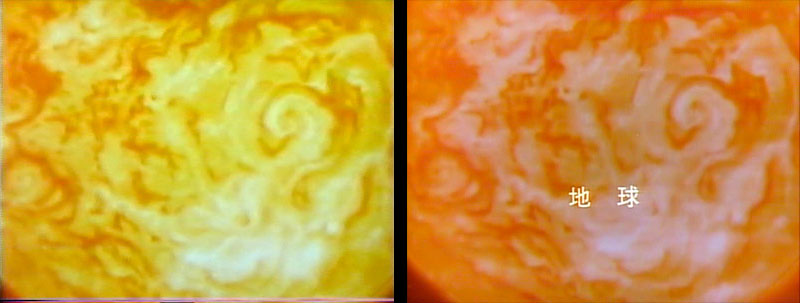
Here, too, viewers of Version A probably didn’t know exactly what they were seeing. Version B labeled it ‘Earth,’ meaning this was the formation of our planet. A helpful thing to know, really.
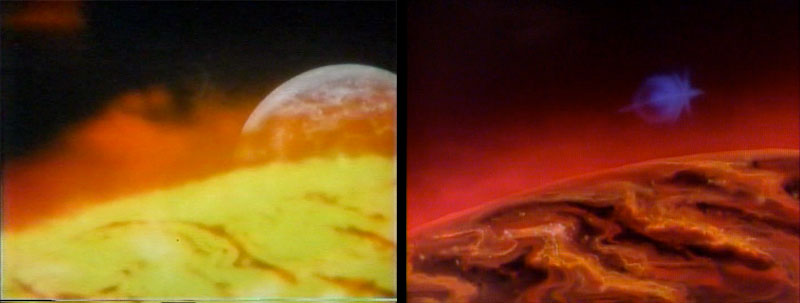
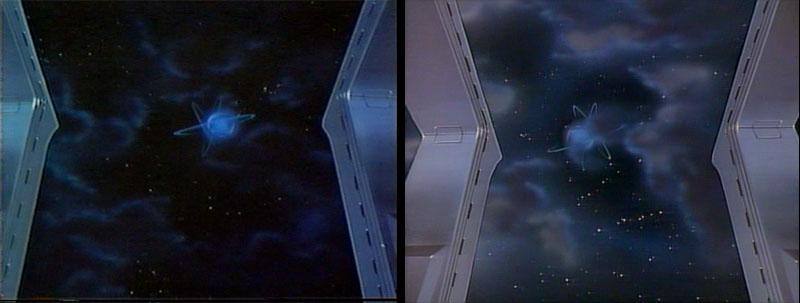
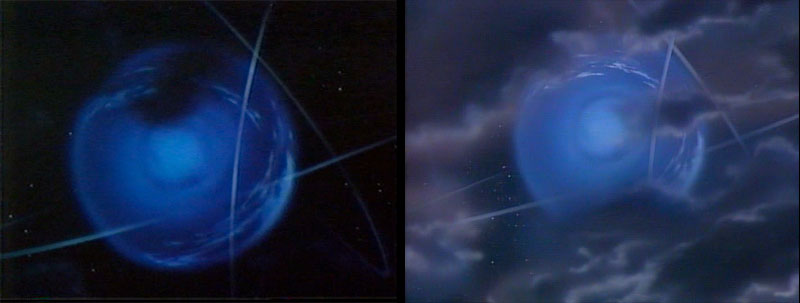
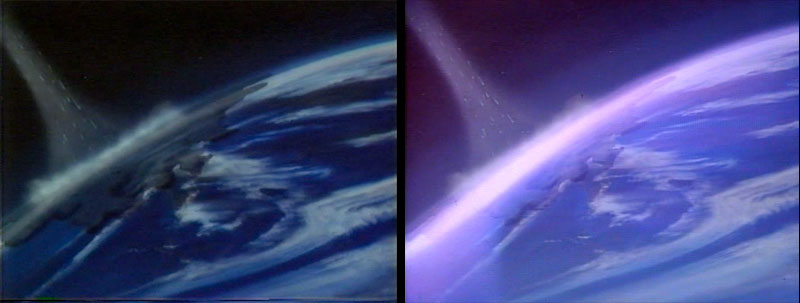
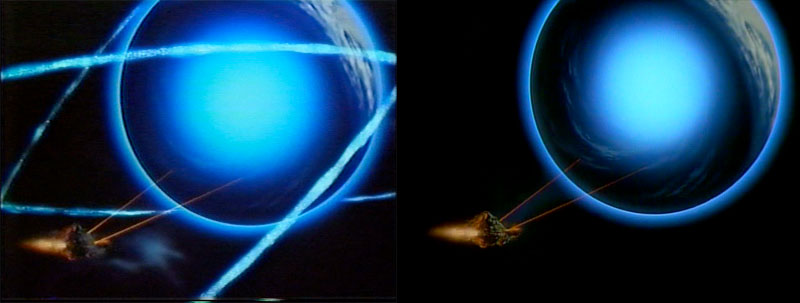
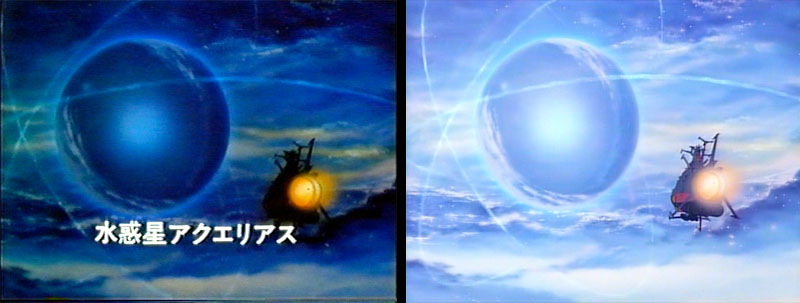
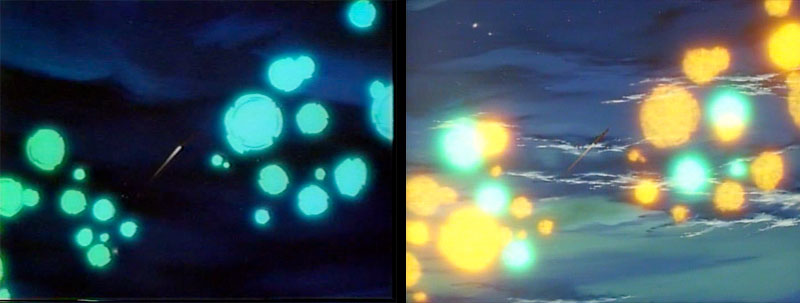
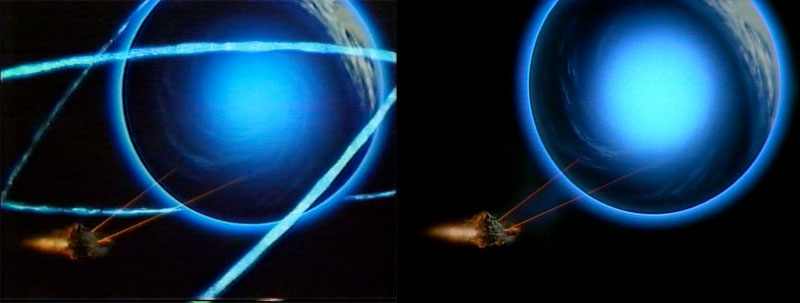
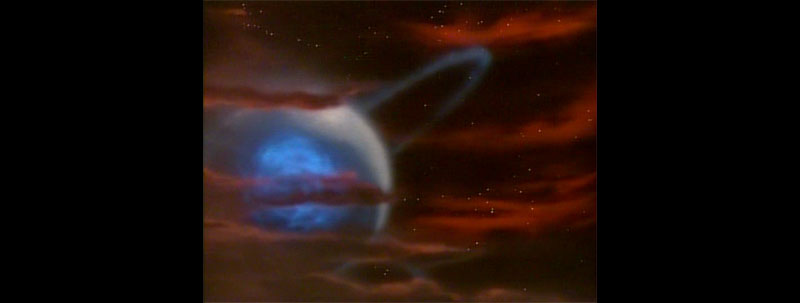
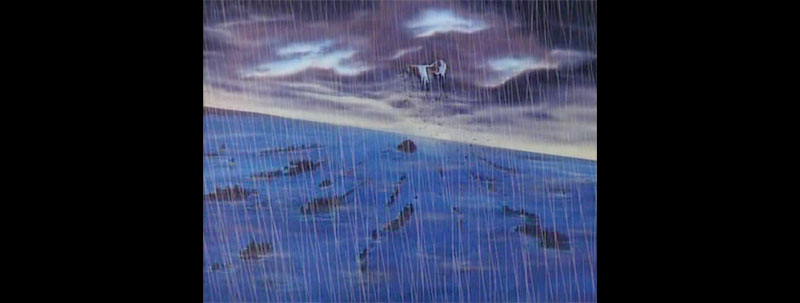
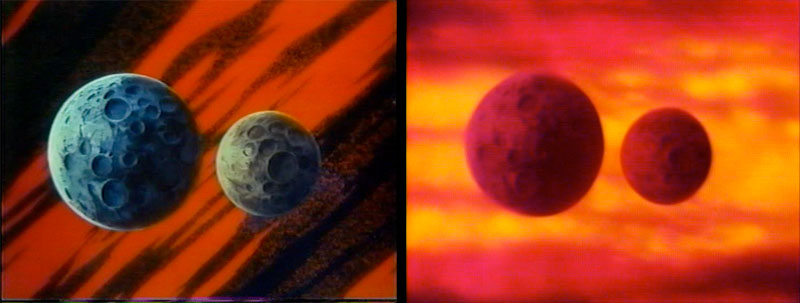
Here’s our first glimpse of Water Planet Aquarius, drifting through the early solar system and about to flood the primordial Earth. In Version A it was only dimly visible past the planetary halo, so the shot was changed and clarified for Version B.
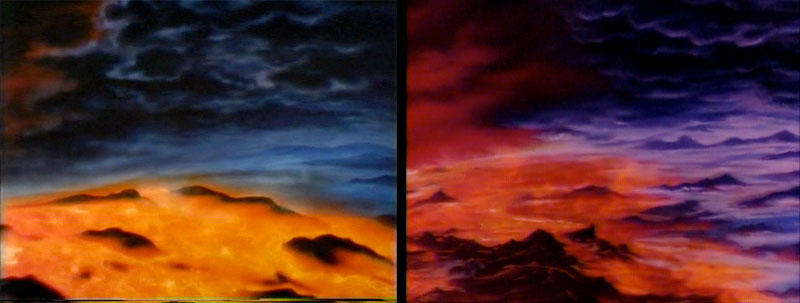
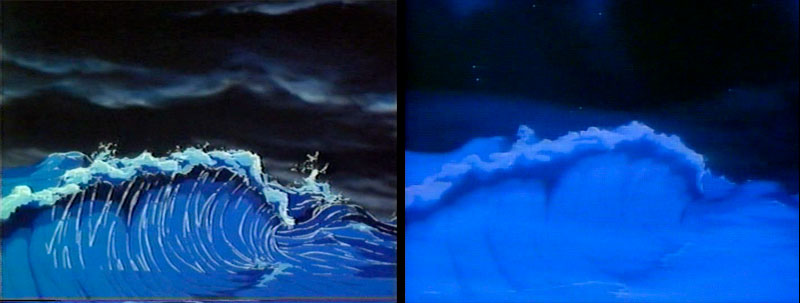
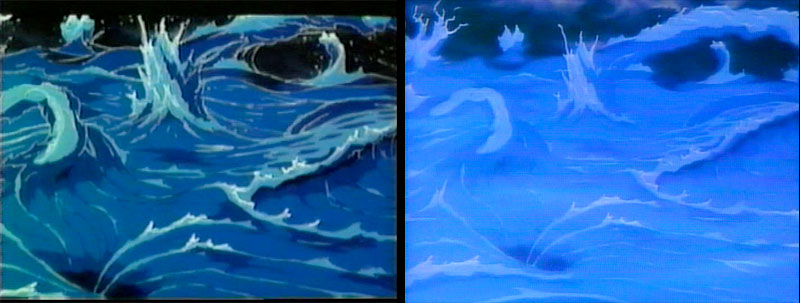
A shot of the Aquarius flood cooling Earth’s surface, very different from A to B.
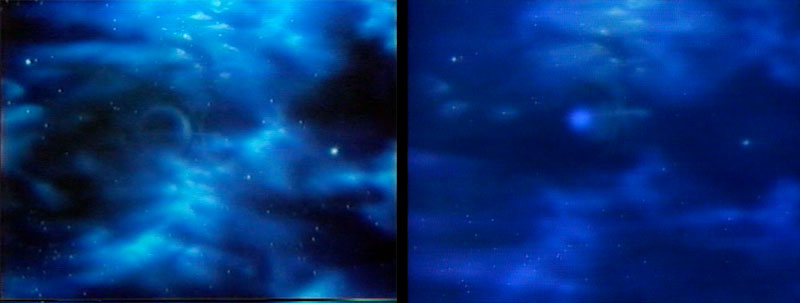
Then another shot of Aquarius, with the surrounding clouds toned down a bit in B. Still not quite enough to make it out, though.
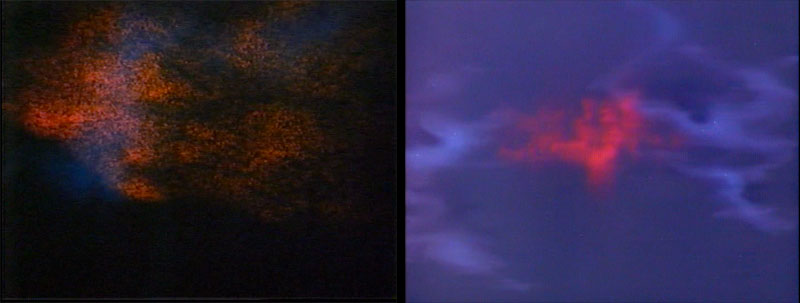
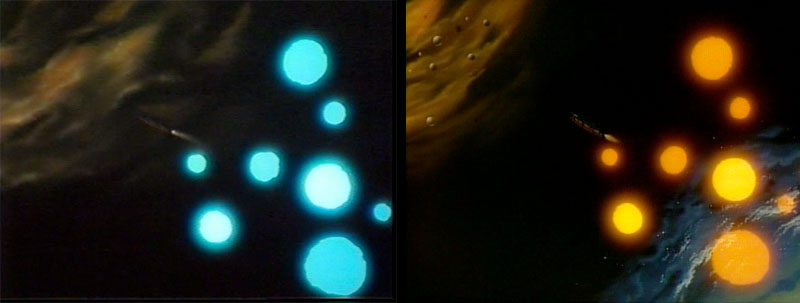
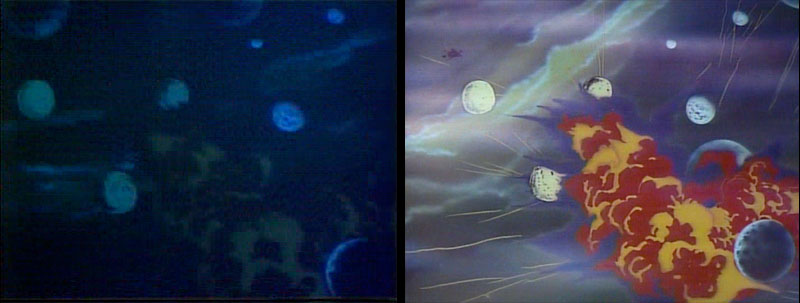
Random galactic phenomenae, very different from A to B.
The opening narration ends, giving way to production credits. The galactic vistas are the same, but Version B enhances them with chroma effects.
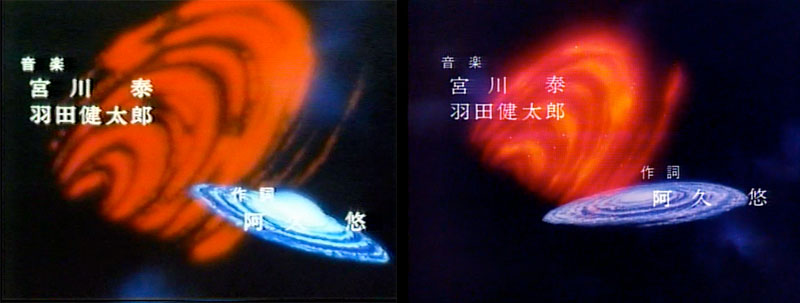
The scene cuts to an extremely wide view of the galactic collision, which was completely redone for Version B.
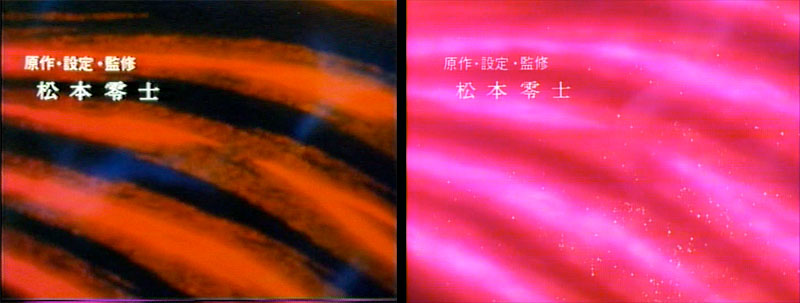
Another production credit.
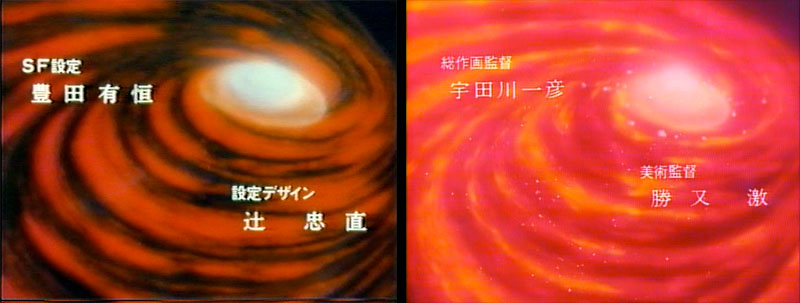
Another extreme wide shot, the same art this time but greatly processed for B.

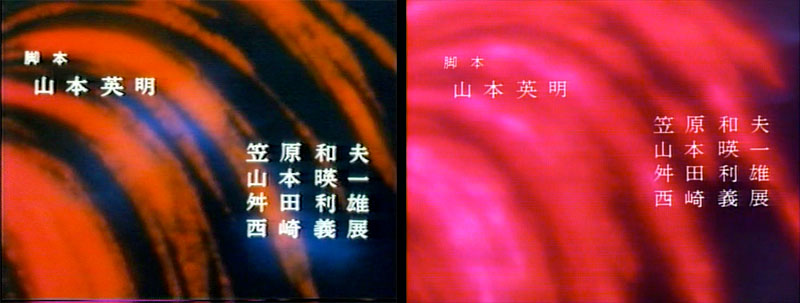
Another production credit.
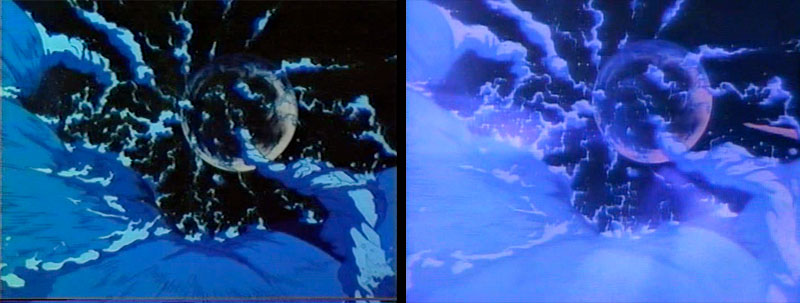
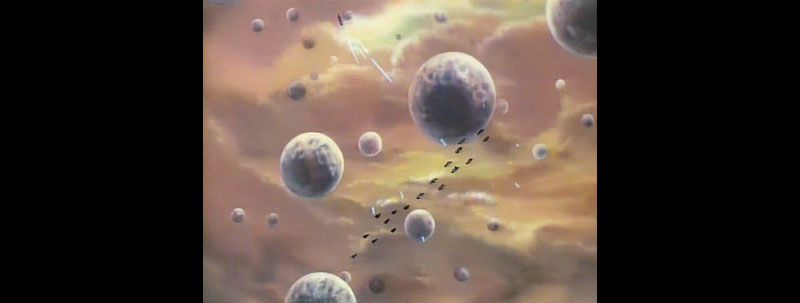
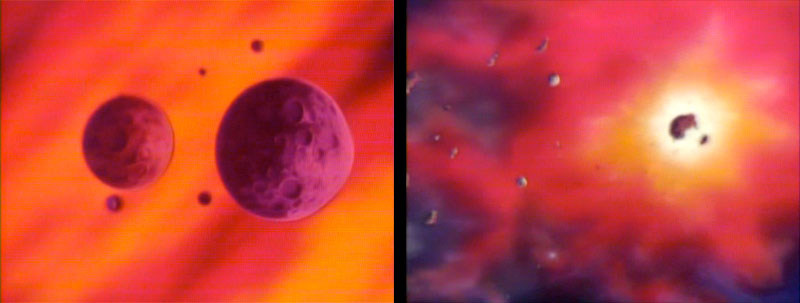
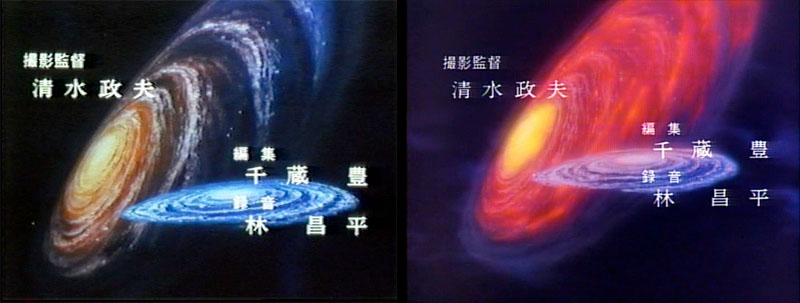
A closer view of the collision with stars and planets taking the impact. Incidentally, this massive intergalactic event was later explained as a temporary dimensional crossover, which is why the red galaxy isn’t seen again after this opening montage.

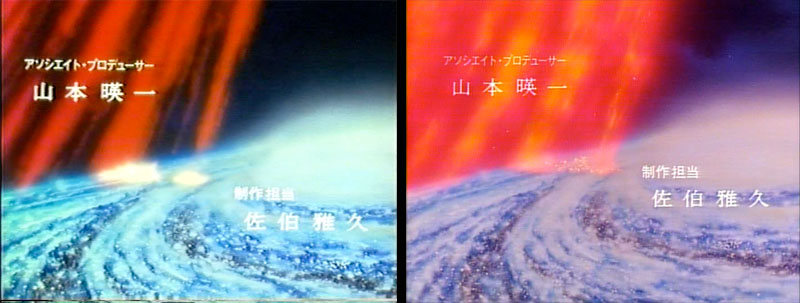
A planet takes the full brunt of the cataclysm. The flying debris was made more visible in B.

More mayhem and destruction as worlds collide.

Back to an extreme wideshot with different cropping and credits
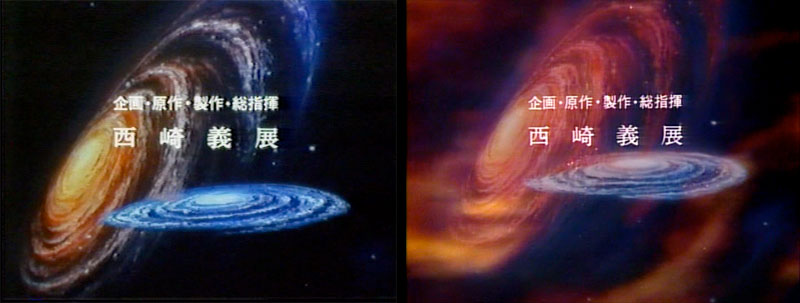
The final credit for Creator/Executive Producer/Etc. Yoshinobu Nishizaki. It would have been a good opportunity to depict the red galaxy vanishing back into a dimensional void, but it was not taken.